

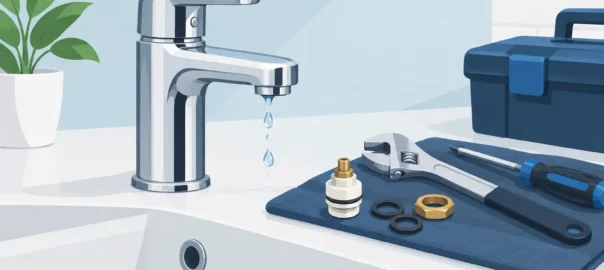
A faucet that drips into the sink may seem minor, but the problem can become expensive quickly. Water can damage the cabinet below, stain countertops, and raise your water bill one drip at a time. Knowing how to replace a leaking faucet gives you a clear path forward when a repair is no longer the sensible choice.
Replacing a faucet is manageable for many homeowners, especially when the existing supply lines and shutoff valves are in good shape. The key is not rushing the job. Confirm what is actually leaking, buy a faucet that fits your sink, and stop the water before loosening a single connection.
First, decide whether replacement is the right fix
Not every leaking faucet needs to be replaced. A drip from the spout often comes from a worn cartridge, washer, O-ring, or valve seat. Replacing that small part may cost less and preserve a faucet that is otherwise in good condition.
Replacement makes more sense when the faucet is corroded, visibly cracked, loose at its base, difficult to operate, or leaking from several places. It is also a practical choice when replacement parts are hard to find or the finish has deteriorated beyond what you want in your kitchen or bathroom.
Look carefully at where the water appears. Water around the handle can point to an internal cartridge or seal problem. Water collecting under the sink may come from the supply lines, drain assembly, shutoff valve, or faucet connections instead. If you cannot identify the source with confidence, a plumbing professional can diagnose the issue before you spend money on the wrong solution.
What to check before buying a new faucet
The new faucet must fit both your sink and your daily routine. Most sinks have one, two, three, or four mounting holes. A single-handle faucet may use one hole, while a widespread bathroom faucet usually needs three. An escutcheon plate can cover unused holes in some installations, but it will not solve every mismatch.
Measure the distance between the outer mounting holes if you have a three-hole sink. Centerset faucets generally use a 4-inch spread, while widespread faucets commonly use an 8-inch spread. For kitchen sinks, check the spout reach and height, especially if there is a window, shelf, or cabinet above the sink.
Also inspect what is under the sink. Older shutoff valves may be stiff, corroded, or prone to leaking when operated after years of sitting in one position. Supply lines that look brittle, rusty, or kinked should be replaced during the project. A new faucet connected to failing old hardware is not a lasting repair.
Gather the right tools and materials
Have everything ready before shutting off the water. A typical faucet replacement calls for a basin wrench, adjustable wrench, channel-lock pliers, bucket, towels, flashlight, and penetrating oil for stubborn mounting nuts. You may also need plumber’s putty or silicone sealant, depending on the faucet manufacturer’s instructions.
Use new braided supply lines if the faucet does not include them. Choose lines with the correct connection size and enough length to reach the shutoff valves without stretching, twisting, or making a sharp bend. Keep the installation instructions nearby. Details such as gasket placement and tightening order vary by model.
How to replace a leaking faucet step by step
Shut off the water and relieve pressure
Start by turning the hot and cold shutoff valves clockwise beneath the sink. Open the faucet to confirm the water is off and to release pressure from the lines. If either valve will not close fully or begins dripping around its stem, stop there. Turning off water at the main valve may be necessary, and a failed shutoff valve is a good reason to call for plumbing service.
Place a bucket and several towels under the sink. Even after the water is off, supply lines and the faucet body will hold a small amount of water.
Disconnect the old faucet
Use an adjustable wrench to loosen the nuts connecting the supply lines to the shutoff valves. Hold the valve steady with a second wrench if needed. Avoid forcing a corroded valve or twisting the pipe behind it, which can create a much larger leak.
Next, look up behind the sink basin for the mounting nuts that secure the faucet. This is often the most awkward part of the job. A basin wrench reaches the nuts in the tight space where ordinary wrenches cannot. Apply penetrating oil and give it time to work if the nuts are corroded.
Once the mounting hardware and supply lines are disconnected, lift the old faucet out from above. Scrape away old putty, mineral buildup, and residue from the sink surface. The new faucet needs a clean, dry surface for its gasket or sealant to work properly.
Install the new faucet
Set the new faucet into the correct mounting holes, following the manufacturer’s directions for any gasket, putty, or sealant. Keep the faucet centered and straight before tightening it underneath. A helper can hold the fixture in place while you secure the mounting nuts.
Tighten the hardware until the faucet is stable, but do not overtighten. Excess force can crack a sink, damage threads, or distort the gasket. Connect the hot and cold supply lines to the corresponding shutoff valves. Hand-tighten first, then use a wrench for a small additional turn. The goal is a secure connection, not maximum force.
If you are installing a kitchen faucet with a pull-down sprayer, attach the hose, weight, and quick-connect fitting exactly as instructed. Make sure the hose can move freely without catching on pipes, stored items, or the cabinet wall.
Turn the water back on slowly
Close the faucet handle, then open each shutoff valve slowly. Watch every connection under the sink as water pressure returns. Check around the faucet base, supply-line connections, shutoff valves, and any sprayer hose connections.
Run both hot and cold water for a minute. This flushes debris from the lines and lets you test the faucet under normal flow. Remove and rinse the aerator if the water sputters or flow seems weak after installation. Finally, fill the sink and drain it while inspecting the cabinet below for leaks.
Common mistakes that create new leaks
The most common problem is overtightening. Faucet connections and mounting hardware need to be snug, but too much pressure can damage fittings and create the very leak you were trying to eliminate. Another frequent mistake is reusing old supply lines, particularly when they show corrosion or have been bent repeatedly.
Do not use plumber’s putty on surfaces where the manufacturer calls for silicone or a rubber gasket. Some natural-stone countertops can also be stained by traditional putty. And never ignore a slow drip after testing. A small leak beneath a sink can soak cabinet materials unnoticed for weeks.
When it is better to call a plumber
A faucet replacement becomes more complicated when the shutoff valves fail, the sink mounting surface is damaged, the water lines are corroded, or access beneath the sink is extremely limited. The same is true if you find mold, swollen cabinet flooring, or water damage after removing the old fixture.
Professional help can also save time when the leak may not be the faucet at all. A trained technician can identify whether water is coming from the drain, garbage disposal, supply connection, valve, or hidden pipe and resolve the actual problem. Empire Care technicians focus on clear diagnosis and repairs that protect your home, not temporary guesswork.
A new faucet should make daily routines easier, not leave you checking under the sink with a flashlight. Take your time, test every connection, and act quickly if anything continues to drip. Protecting a small area today can prevent a much bigger repair tomorrow.