Category Archives: Uncategorized

When Indoor Air Quality Testing Makes Sense

When Indoor Air Quality Testing Makes Sense

A room can look spotless and still hold onto the things that make people uncomfortable: a musty odor that returns after cleaning, headaches that ease when everyone leaves the house, or one bedroom that always feels stuffy. Indoor air quality testing gives homeowners a clearer answer than guesswork, especially when the source is not obvious.

The goal is not to prove that every home has a major air problem. Most concerns have a practical cause, such as excess humidity, poor ventilation, dust buildup, an aging filter, or an HVAC issue that needs attention. Testing helps separate a minor maintenance need from a condition that deserves a more focused repair.

What Indoor Air Quality Testing Can Tell You

Indoor air testing is not one single test. A qualified professional may evaluate the air, the HVAC system, humidity levels, ventilation, and visible conditions around the home. What is tested should match the concern you are experiencing.

For example, high humidity can support mold growth and leave a home feeling clammy, while low humidity can worsen dry skin, irritated sinuses, and static electricity. Carbon dioxide readings can help show whether a space is getting enough fresh-air exchange. Particle testing can indicate levels of fine dust, smoke, pet dander, and other airborne material. Depending on the situation, a professional may also recommend testing for volatile organic compounds, combustion byproducts, or mold-related concerns.

The results matter most when they are paired with a full home assessment. A number on a report does not fix anything by itself. Your technician should explain what was found, what it may mean for your household, and what steps are worth taking first.

Signs Your Home May Need Air Testing

A persistent odor is one of the clearest reasons to investigate. A damp, earthy smell can point to moisture in a crawl space, basement, duct system, wall cavity, or around a cooling component. A chemical smell may come from recent renovations, stored products, furnishings, or a ventilation problem. If the odor keeps returning, covering it with fragrance is not a solution.

Health symptoms are another reason to pay attention, particularly when they occur mainly at home. Coughing, sneezing, throat irritation, headaches, or worsening allergy and asthma symptoms can have many causes, so it is wise not to assume the air is responsible. But if symptoms improve away from the house or become more noticeable when the HVAC system runs, air quality and ventilation deserve a closer look.

You may also want an assessment after water damage, a roof or plumbing leak, smoke exposure, a remodeling project, or a long period with the home closed up. These situations do not automatically mean the air is unsafe. They do create conditions where moisture, particles, and airborne contaminants can become more likely.

What Happens During an Indoor Air Quality Test

The first part of a useful visit is a conversation. A technician should ask when the problem started, which rooms are affected, whether anyone has symptoms, what changes have occurred in the home, and how the heating and cooling system has been operating. Details such as a recent leak, new flooring, a pet, or a room that is rarely used can help narrow the search.

Next comes a visual inspection. This may include checking filters, returns and supply vents, accessible ductwork, drain pans, humidifiers, air handlers, and areas with signs of moisture. The technician may measure temperature and relative humidity, look for airflow issues, and inspect for conditions that can allow pollutants to build up.

Air or surface samples may be appropriate in certain cases. Sampling should answer a specific question, not create an expensive report with no clear next step. For mold concerns, for instance, the more urgent issue is often finding and correcting the moisture source. Testing can provide helpful information, but it should never replace a careful inspection or a proper repair.

A good provider will explain the limits of testing as well. Air conditions can change with weather, open windows, cleaning products, cooking, occupancy, and HVAC operation. One sample captures a moment in time. That is why experienced interpretation and a practical action plan matter as much as the sample itself.

Common Problems Testing Can Help Uncover

Indoor air quality testing often points back to a home system that needs service. The most common findings are not dramatic, but they can have a real effect on comfort.

Poor filtration is a frequent example. A filter that is overdue for replacement, installed backward, too restrictive for the equipment, or poorly fitted can allow more particles to circulate or reduce airflow. The right filter depends on your system and household needs. Higher-rated filters can capture smaller particles, but a filter that is too dense for the equipment may strain airflow. This is a decision that should be made with the HVAC system in mind, not just the label on the package.

Ventilation is another issue. Modern homes can be tightly sealed, which helps with energy efficiency but can reduce fresh-air exchange. Bathrooms, kitchens, laundry spaces, and rooms with gas appliances need effective exhaust and proper operation. A fan that vents into an attic instead of outdoors can move moisture to the wrong place rather than remove it.

HVAC maintenance also affects the air you breathe. Dirty coils, clogged condensate drains, damaged ducts, and airflow imbalances can contribute to dust, humidity problems, odors, and uneven temperatures. Duct cleaning can be useful when there is confirmed buildup, debris after renovation, signs of contamination, or other clear reasons. It is not a substitute for repairing a moisture problem or maintaining the HVAC equipment.

How to Prepare for Testing

You do not need to deep-clean the house or try to make the symptoms disappear before an appointment. In fact, normal conditions usually provide the most useful picture. Avoid unusual measures such as running multiple air fresheners, using strong cleaners right before the visit, or leaving windows open all day if that is not how you normally live.

Make a short note of what you have noticed: where odors are strongest, when symptoms occur, whether the issue changes when the system runs, and any recent water events or renovations. If you have photos of a leak, staining, visible growth, or damaged insulation, keep those available. Small details can save time and help the technician focus on the likely source.

If anyone in the home has serious respiratory symptoms, a known environmental sensitivity, or a medical concern, contact a health care professional as well. Indoor air testing can identify conditions in the home, but it does not diagnose health conditions.

Turning Results Into a Clear Plan

The right next step depends on what testing and inspection reveal. A simple recommendation may be to replace a filter, adjust humidity, clean a drain line, repair an exhaust fan, or schedule routine HVAC maintenance. More involved work may include sealing or repairing ductwork, addressing a leak, improving ventilation, removing contaminated materials, or considering air-cleaning equipment.

Be cautious of one-size-fits-all solutions. An air purifier may reduce certain airborne particles, but it will not repair a leaking pipe, remove moisture from a damp crawl space, or correct a gas combustion issue. Likewise, a dehumidifier can help in the right space, but it cannot solve a persistent source of water intrusion. The first priority is always to correct the underlying condition.

For homeowners, the best outcome is not a complicated report. It is a home that smells clean, maintains comfortable humidity, circulates air properly, and gives your family fewer reasons to worry. Empire Care approaches indoor comfort concerns by looking for the real source, explaining the options plainly, and helping you make a confident repair decision.

If something in your home feels off, trust the pattern you are noticing. A careful assessment can replace uncertainty with a practical next step and help protect the comfort of the people who live there.
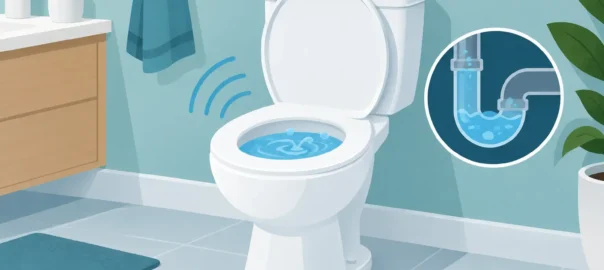
Why Is My Toilet Gurgling? Causes and Fixes

Why Is My Toilet Gurgling? Causes and Fixes

A toilet that burps, bubbles, or makes a gulping sound after flushing is trying to tell you something. If you are asking, why is my toilet gurgling, the short answer is that air is moving through your plumbing when it should not be. The sound may come from a minor blockage near the toilet, but it can also be an early warning that a drain line, plumbing vent, or main sewer line needs attention.

The key is knowing whether you are dealing with one slow fixture or a problem affecting the home’s drainage system. Addressing the cause early can help prevent an unpleasant backup, water damage, and a much more stressful repair call.

Why Is My Toilet Gurgling After I Flush?

Your home’s drain system needs two things to work correctly: a clear path for wastewater to leave and enough air pressure to keep that water moving. Plumbing vents, which typically run through the roof, supply that air. When a drain or vent is restricted, water can pull or push air through the toilet trap instead. That is the gurgle you hear.

A single gurgle after an unusually large flush does not always mean an emergency. Repeated noises, bubbling water in the bowl, slow draining, or sounds that occur when another fixture runs are different. Those symptoms usually point to a developing obstruction or venting issue, not a toilet that is simply being noisy.

A partial clog in the toilet or nearby drain

A blockage in the toilet trap or the drain line immediately beyond it is one of the most common causes. Toilet paper buildup, wipes labeled “flushable,” paper towels, small toys, hygiene products, and other objects can partially obstruct the pipe. Water gets past the restriction, but air gets displaced unevenly, creating bubbling or gurgling.

You may notice that the toilet flushes, but not with its usual force. The bowl water might rise before slowly dropping, or the toilet may need a second flush. When the problem is limited to that one bathroom fixture, a local blockage is more likely than a main sewer issue.

A clogged plumbing vent

A vent pipe can become blocked by leaves, nesting material, debris, or, in some climates, ice. Without proper venting, the drain system struggles to equalize pressure. The toilet may gurgle when flushed, or it may make noise when a sink, shower, washing machine, or dishwasher drains.

Vent problems are easy to overlook because nothing may be visibly clogged inside the bathroom. They also should be diagnosed carefully. Climbing onto a roof or attempting to clear a vent without the right equipment creates a fall risk and may not resolve the actual restriction.

A blockage in the main sewer line

When more than one fixture is involved, the main sewer line becomes a serious possibility. This is the pipe that carries wastewater from the home to the municipal sewer connection or septic system. Grease buildup, settled debris, damaged pipe, tree root intrusion, or a sagging line can reduce the pipe’s capacity over time.

A main-line blockage often shows up first at the lowest fixture in the home. For many houses, that is a first-floor toilet, basement shower, floor drain, or laundry drain. You may hear the toilet gurgle when the washing machine empties or see water move in the toilet bowl when a nearby tub drains. Those are signs that wastewater may be looking for another place to go.

A septic system problem

For homes with septic systems, gurgling can mean the tank is overdue for pumping, the outlet filter is restricted, or the drain field is not accepting wastewater properly. The symptoms can resemble a sewer-line clog: slow drains, gurgling fixtures, sewage odors, or backups at low points in the home.

A plunger will not fix a full septic tank or a drain-field failure. Continuing to send large amounts of water down the drains can make the situation worse, so reduce water use and arrange an inspection.

Signs a Gurgling Toilet Needs Fast Attention

A gurgle is not always a crisis, but certain combinations of symptoms deserve a prompt professional response. Stop using the affected fixtures and arrange service if you notice any of the following:

  • Water or sewage backing up into a tub, shower, floor drain, or basement fixture.
  • More than one sink, toilet, or tub draining slowly at the same time.
  • Toilet water rising close to the rim, overflowing, or repeatedly bubbling without being flushed.
  • Sewage odors indoors or wet, foul-smelling areas near drains or outside sewer cleanouts.
  • Gurgling that starts whenever a washing machine, dishwasher, shower, or another toilet drains.

A sewer backup can expose your household to contaminated water, so avoid contact with it. Keep children and pets away from the area, and do not run the dishwasher, washing machine, or additional showers until the cause is identified.

What You Can Safely Try Before Calling a Plumber

If the toilet is the only affected fixture and there is no backup, start with a few simple checks. First, flush once and watch how the water behaves. A slow swirl, weak flush, or rising bowl water supports the possibility of a local toilet clog.

Use a flange-style toilet plunger, not a flat sink plunger. Make sure there is enough water in the bowl to cover the plunger cup, create a tight seal, and use steady pushes and pulls for about 15 to 20 seconds. Then wait a moment and test with one flush. Avoid repeated flushing if the water level rises.

If plunging does not help, a toilet auger may reach an object lodged in the toilet’s built-in trap. Use it gently to avoid scratching porcelain. If you pull out a foreign object and the toilet returns to normal, monitor it over the next day for recurring sounds or slow drainage.

Do not pour chemical drain cleaners into a gurgling toilet. These products often fail against solid obstructions, can damage older pipes or seals, and may leave caustic liquid in the bowl for the next person who works on the drain. Avoid trying to clear a main line through a roof vent as well. A professional drain inspection is safer and more reliable.

How a Professional Finds the Real Cause

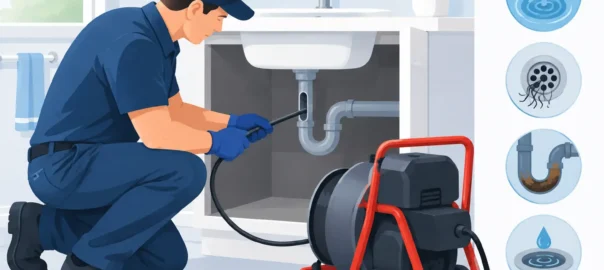
The right repair starts with locating the restriction rather than guessing. A trained plumber will ask which fixtures are affected, inspect the toilet and nearby drains, and check accessible cleanouts. If a deeper blockage is suspected, drain-cleaning equipment can clear the line while a sewer camera provides visual verification of what is inside.

Camera inspection is especially useful when a blockage keeps returning. It can reveal roots, cracked or offset pipe sections, heavy buildup, or a low section of pipe that holds waste. That distinction matters because clearing roots may restore flow for now, while a broken or sagging pipe may require a longer-term repair.

At Empire Care, the goal is to identify the real source of the problem, explain the findings clearly, and recommend the repair that protects your home rather than applying a temporary fix without answers.

Can You Prevent Toilet Gurgling?

Some causes cannot be prevented entirely, particularly aging sewer pipes or intrusive tree roots. Still, daily habits make a meaningful difference. Toilets are designed for human waste and toilet paper only. Wipes, even those marketed as flushable, do not break down like toilet paper and are a frequent cause of drain restrictions.

Keep grease, food scraps, and coffee grounds out of kitchen drains, since they can contribute to main-line buildup farther downstream. If your home has mature trees near the sewer route or a history of recurring drain problems, preventive drain maintenance and periodic camera inspections may be worth considering. For septic homes, stay on a regular pumping schedule based on household size and tank capacity.

A gurgling toilet is often the first audible sign that your plumbing needs help. Pay attention before the sound becomes a backup, use the toilet sparingly if other drains are involved, and have the system checked when the noise does not quickly resolve.

10 Sewer Line Warning Signs You Shouldn't Ignore

10 Sewer Line Warning Signs You Shouldn’t Ignore

A toilet bubbling while the washing machine drains is more than an annoying plumbing quirk. It can be one of the earliest sewer line warning signs that wastewater is no longer moving freely away from your home. Catching the problem early can mean the difference between a targeted repair and a contaminated backup inside your home.

Your sewer line carries wastewater from every toilet, sink, shower, appliance, and drain to the municipal sewer or septic system. Because it is buried and out of sight, many homeowners do not think about it until a drain stops working. The better approach is to pay attention when several fixtures begin acting differently at the same time.

10 Sewer Line Warning Signs to Watch For

1. Multiple drains are slow at once

One slow bathroom sink may be caused by hair, soap buildup, or a local clog in that fixture’s drain. But when the shower, kitchen sink, and toilets all drain slowly, the restriction may be farther down the plumbing system.

A developing sewer line blockage often affects the lowest drains first, then becomes more noticeable throughout the home. Do not assume repeated use of store-bought drain cleaner will fix it. Chemical products can damage certain pipes, create safety concerns, and rarely solve a blockage deep in the main line.

2. Toilets gurgle or bubble unexpectedly

A toilet should flush quietly and refill normally. Gurgling, bubbling water, or changes in the bowl water level can mean air is being forced back through the plumbing because wastewater cannot pass through the sewer line as it should.

This is especially concerning when the sound happens after you run a sink, shower, dishwasher, or washing machine. The fixture may not be the problem. It may simply be the place where the pressure becomes visible.

3. Water backs up into a tub or shower

Water coming up through a shower drain after you flush a toilet is a clear reason to stop using water and call for professional help. Tubs and showers are often among the lowest fixtures in a home, so they can become the first place wastewater appears when the main sewer line is blocked.

The water may look gray, dirty, or contain debris. Treat it as contaminated wastewater. Keep children and pets away, avoid walking through the area, and do not continue flushing or running faucets to test the issue.

4. You have recurring clogs in different fixtures

A plunger can be useful for an occasional toilet clog, and a sink trap may need periodic cleaning. What should not become normal is a cycle of clogs that returns every few weeks in different parts of the house.

Recurring clogs can point to grease buildup, scale, an object lodged in the line, or tree roots entering through a small crack or joint. The cause matters because each requires a different repair. Clearing the immediate blockage without identifying why it came back can lead to another backup at the worst possible time.

5. There is a sewage odor indoors or outside

Sewage has a distinct odor, and your home should not smell like it. A persistent smell near a basement drain, bathroom, crawlspace, yard, or sewer cleanout can signal a cracked pipe, failing seal, partial blockage, or a backup beginning below the surface.

Some odors come from a dry drain trap, particularly in a rarely used bathroom or floor drain. Pouring water into that drain may restore the water seal. If the odor remains, returns quickly, or appears alongside slow drains and gurgling, it deserves a thorough inspection.

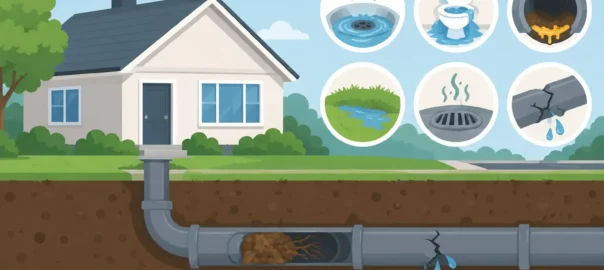
6. Your yard has unusually green, wet, or sunken areas

A damaged underground sewer line can release moisture and nutrients into the soil. That may create a patch of grass that is greener or grows faster than the rest of the yard. You may also notice soggy ground without recent rain, a sewage smell outdoors, or a depression where soil has started to settle.

Not every wet spot is a sewer problem. Irrigation leaks, poor drainage, and broken water lines can create similar symptoms. A qualified technician can identify the source rather than guess based on the appearance of the yard alone.

7. You see wastewater near the sewer cleanout

The sewer cleanout is an access point, often found outside near the foundation or in a basement. If water or sewage is pooling around it, the main line may be blocked downstream of that point.

Avoid removing a cleanout cap yourself when a backup is active. Pressure in the pipe can release wastewater suddenly. A professional can open the line safely, clear the blockage, and determine whether the problem is inside the property’s sewer line or farther down the system.

8. Drain problems get worse after heavy water use

A partially blocked sewer line may seem manageable until the household creates a larger volume of wastewater. A load of laundry, long shower, dishwasher cycle, or several toilet flushes can overwhelm the restricted pipe and trigger a backup.

This pattern is useful information for diagnosis. Let the technician know which appliance or fixture was running when the problem occurred and where water first appeared. Small details help narrow down the location and likely cause of the obstruction.

9. Your home has mature trees near the sewer route

Tree roots naturally grow toward moisture. Even a tiny opening in an older sewer pipe can attract roots, which then expand inside the line and catch paper and debris. Over time, flow slows and backups become more frequent.

Root intrusion is common, but it is not the only possibility. Older clay, cast-iron, or Orangeburg pipes may crack, corrode, deform, or collapse with age. Camera inspection provides visual confirmation of what is happening inside the line, so repair recommendations can be based on the actual condition of the pipe.

10. A sewer backup has happened before

Past backups should not be treated as bad luck, especially if they occurred without an obvious cause such as a flushed object. A previous blockage may have been cleared, while roots, pipe damage, a sagging section of pipe, or buildup remained behind.

If your home has a history of main-line trouble, schedule an evaluation before the next backup. Preventive cleaning can be appropriate in some situations, but ongoing cleaning is not always the answer. If a camera shows major damage or a collapsed section, a lasting repair may protect your home and budget better than repeated emergency calls.

What to Do When You Notice Sewer Line Warning Signs

Start by limiting water use. Do not run the dishwasher, washing machine, showers, or extra toilet flushes while you are seeing backup symptoms. More water can turn a partial blockage into an indoor sewage event.

Next, protect the affected area. Keep people and pets away from wastewater, wear protective gear if you must be nearby, and do not attempt to clear a suspected main sewer blockage with chemicals. If sewage has entered finished living space, professional cleanup may also be needed to address contamination.

Then arrange a professional diagnosis. A proper sewer service visit should do more than temporarily restore flow. Drain-clearing equipment can remove many obstructions, while a sewer camera inspection can show root intrusion, cracks, bellies, separated joints, or other damage inside the pipe. This visual evidence helps you understand the recommended repair and make a confident decision.

When It May Not Be the Main Sewer Line

Not every drain issue means a sewer emergency. If only one sink, tub, or toilet is slow and every other fixture works normally, the clog may be local to that fixture’s branch drain. Likewise, a toilet that clogs only after excess paper is used may need a different solution than a whole-home drainage problem.

The strongest clue is whether multiple fixtures are involved, particularly when water moves from one fixture into another. A professional can distinguish between a simple local clog, a main sewer line obstruction, a venting issue, or a municipal sewer concern. That clarity prevents you from paying for the wrong fix.

A sewer problem rarely improves by waiting. If the warning signs are appearing in more than one part of your home, act before the next shower, laundry load, or toilet flush turns a manageable repair into a major cleanup. Empire Care can help identify the real cause and give you a clear path forward.

When a Drain Cleaning Service Is the Right Call

When a Drain Cleaning Service Is the Right Call

A slow kitchen sink can feel like a small annoyance until water starts pooling around your feet in the shower, the toilet gurgles, or wastewater backs up where it does not belong. A professional drain cleaning service does more than get water moving again. It helps identify why the blockage happened, clear it safely, and reduce the chance of another disruption a few days or weeks later.

For homeowners, the right response depends on the location, severity, and history of the drain problem. A single sink with a minor slowdown may have a simple cause. Multiple slow drains, recurring backups, or sewage odors require a closer look. Waiting too long can turn a manageable clog into water damage, an unsanitary cleanup, or a more expensive sewer repair.

Signs You Need a Drain Cleaning Service

The clearest sign is a drain that will not empty, but serious problems often begin with less obvious warnings. Pay attention when water drains slowly in the same fixture after basic cleaning, when a toilet bubbles as another fixture drains, or when you hear gurgling from pipes behind walls or under floors. Those sounds can mean air is being forced around a blockage instead of moving normally through the plumbing system.

A bad odor is another reason to act. Food residue, grease, soap buildup, hair, and standing wastewater can create odors near a sink, tub, shower, or floor drain. In some cases, an odor may point to a dry trap or venting issue rather than a clog. That is why an accurate diagnosis matters before anyone treats the symptom alone.

Call for professional help promptly when more than one drain is affected. A slow shower plus a gurgling toilet, for example, can indicate a blockage farther down the branch line or in the main sewer line. If wastewater comes back through a tub, shower, floor drain, or toilet, stop running water in the home and arrange service. Adding more water can make the backup worse.

What Causes Stubborn Drain Clogs?

Most drain problems build gradually. In bathrooms, hair combines with soap residue and personal-care products to form a sticky blockage. In kitchens, cooking grease may seem liquid when it goes down the sink, but it cools and clings to pipe walls. Coffee grounds, food scraps, rice, pasta, and fibrous vegetables can add to the buildup, especially when a garbage disposal is asked to handle more than it should.

Some clogs are not caused by daily habits. Older pipes can develop rough interior surfaces that catch debris. Pipe sections may sag, shift, crack, or become misaligned over time. Outside, tree roots can find their way into small openings in a sewer line and expand inside the pipe. These conditions can cause repeated stoppages even when everyone in the household is careful about what goes down the drain.

A recurring clog is not a problem to keep resetting with a plunger or chemical product. Repetition is useful information. It often means there is a deeper restriction, a damaged section of pipe, or a main-line issue that needs to be located.

Why Professional Cleaning Is Different

Store-bought drain chemicals promise a fast fix, but they can be a poor match for many homes. Strong chemical cleaners may not reach the full blockage, particularly when the clog is farther down the line. They can also sit in a pipe, create harmful fumes, and potentially damage certain plumbing materials when used repeatedly. Never mix drain-cleaning chemicals or add another product after one fails to work.

Professional drain cleaning begins with determining where the problem is. A trained technician may use the appropriate cable machine to remove a localized blockage or use high-pressure water cleaning for heavy buildup in suitable lines. The best method depends on the pipe material, the drain location, the nature of the obstruction, and the condition of the plumbing.

For recurring or hard-to-explain backups, a camera inspection can provide answers that guesswork cannot. A small camera sent through the line can show grease accumulation, root intrusion, breaks, offsets, or other issues inside the pipe. Visual verification helps separate a simple cleaning need from a repair or replacement decision. It also gives homeowners clearer information about what they are paying to fix.

At Empire Care, the goal is to solve the actual plumbing problem, not simply make the symptom disappear long enough to leave the driveway. That means explaining what was found, what cleaning can reasonably accomplish, and whether the line needs additional repair attention.

What to Expect During Drain Cleaning Service

A dependable visit should start with questions about the issue: which fixtures are affected, when the trouble began, whether it has happened before, and whether anything recently went down the drain. This history can help narrow the cause before work starts.

The technician should then test the affected fixtures and assess the line. If the problem appears localized, cleaning may be straightforward. If several fixtures are involved, the technician may inspect a cleanout access point or recommend a camera examination of the sewer line. Homeowners should expect clear communication before major work begins, including the likely cause and the recommended path forward.

Once the drain is cleared, testing matters. Water should be run through the fixture to confirm normal flow and check for remaining signs of a restriction. When a camera is used, post-cleaning footage can help verify that buildup or roots were removed to the extent possible and reveal any pipe condition that cleaning alone cannot correct.

There is a practical trade-off here. A basic clearing may restore use quickly at a lower immediate cost, while deeper cleaning or camera inspection can provide more certainty about repeat problems. For a first-time minor clog, a simple solution may be enough. For a line that has backed up twice in six months, investing in diagnosis can prevent another emergency and protect the home from a bigger mess.

How to Protect Drains Between Service Visits

Good drain habits will not fix damaged pipes or tree roots, but they can limit common buildup. Keep grease, oil, and fat out of kitchen sinks. Let them cool in a container and dispose of them in the trash. Use sink strainers to catch food particles and hair, and empty them regularly.

In bathrooms, remove visible hair from shower and tub drains before it gets pulled farther into the line. Flush only toilet paper and human waste. Wipes labeled flushable, cotton products, paper towels, dental floss, and hygiene products do not belong in the toilet. They can catch in pipes and contribute to a blockage long after they are out of sight.

Avoid treating every slow drain with chemical cleaner. If a plunger does not improve a minor localized clog, or the same fixture keeps slowing down, schedule an inspection instead. Early service is usually cleaner, faster, and less stressful than dealing with a full backup.

When Drain Trouble Becomes an Urgent Plumbing Issue

Some situations should not wait for a convenient appointment. Sewage backing up into the home, water spreading from a floor drain, or a toilet overflowing repeatedly can create sanitation concerns and damage flooring, walls, and belongings. Keep children and pets away from contaminated water, avoid using sinks, toilets, showers, dishwashers, and washing machines, and contact a qualified plumbing professional.

Commercial properties face a similar concern, often with greater operational impact. A clogged restroom line, break-room sink, or floor drain can disrupt employees and customers quickly. Prompt diagnosis helps property managers address the immediate issue while planning for any needed line repair with less disruption to the workplace.

Your drains work quietly when everything is moving as it should. When they start sending warnings, trust those signs. A timely professional assessment can protect your home, your schedule, and your peace of mind before a slow drain becomes a backup no one wants to manage.

When to Call an Air Conditioner Repair Service

When to Call an Air Conditioner Repair Service

A failing air conditioner rarely waits for a convenient time. It starts with a bedroom that never cools down, a system that runs all afternoon without lowering the temperature, or an unexpected puddle near the indoor unit. An air conditioner repair service is not just about getting cold air back. It is about finding the actual source of the problem before a small issue becomes a costly interruption to your home’s comfort.

For homeowners, the right response depends on what the system is doing, how long the trouble has been happening, and whether there are any safety concerns. Some problems need immediate attention. Others may be manageable for a day or two, but should not be ignored through the next heat wave.

Signs Your Air Conditioner Needs Professional Repair

Warm air from the vents is the most obvious warning sign, but it is not the only one. Your thermostat may be set correctly while the equipment outside is not running, the refrigerant level is low, or airflow is restricted. Turning the thermostat lower usually will not solve any of those problems. It may only keep the system running longer and add unnecessary strain.

Weak airflow deserves attention as well. If air barely reaches rooms that normally stay comfortable, the cause could be a clogged filter, a blower problem, leaking ductwork, a frozen coil, or a restriction in the system. Replacing a dirty filter is a sensible first step, but a filter is not the answer to every airflow issue.

Call for repair when you notice persistent banging, grinding, buzzing, or squealing. HVAC equipment is not silent, but new or loud sounds can point to loose components, motor trouble, electrical issues, or a failing part. Continuing to operate the unit can turn a repairable issue into more extensive damage.

Water around the indoor air handler is another reason to act quickly. Condensation is normal during cooling, but it should drain properly. A clogged condensate line can cause overflow, water damage, and in some cases a system shutdown. Ice on the refrigerant lines or indoor coil is also a warning sign. It may look minor, yet frozen equipment can indicate airflow trouble or a refrigerant-related problem that needs a trained technician to diagnose.

What a Good Air Conditioner Repair Service Should Do

A proper repair visit should begin with questions, inspection, and testing, not a quick guess. A technician needs to understand what you have noticed: when the issue started, whether it is constant or intermittent, whether the system cools at certain times of day, and if you have seen changes in energy use or humidity.

Then comes the diagnostic work. That may include checking thermostat operation, electrical connections, capacitors, motors, refrigerant performance, drain components, filters, coils, and airflow. The goal is to identify the reason for the failure, not simply treat the symptom.

Clear communication matters just as much. Before authorizing work, you should know what failed, what repair is recommended, what it is expected to cost, and whether another concern could affect the system’s performance. A dependable contractor respects your home, answers direct questions, and gives you information you can use to decide.

At Empire Care, that service-first approach means focusing on problem resolution, respectful in-home work, and real accountability for your comfort. You should never feel pressured to approve a repair you do not understand.

Repair or Replace? The Answer Depends on the System

Not every air conditioning problem means replacement is necessary. Many common issues, including failed capacitors, contactors, drain clogs, worn electrical parts, thermostat malfunctions, and certain motor problems, can be repaired effectively. If the unit has been reliable, the repair is reasonably priced, and the equipment is not near the end of its expected service life, repair often makes good financial sense.

Replacement becomes a more serious consideration when breakdowns keep returning, repair costs are high, the system is older and inefficient, or the equipment no longer keeps up with your home. An older unit that uses an outdated refrigerant may also be more expensive or difficult to repair over time. The best choice is not always the cheapest option today. It is the option that gives you reliable comfort without repeatedly paying for the same aging system.

A trustworthy technician should explain both paths. If repair can safely restore dependable cooling, you deserve to hear that. If replacement would better protect your budget over the next several years, you deserve a clear explanation of why.

What You Can Check Before Scheduling Service

There are a few safe checks that can help rule out simple causes. Confirm that the thermostat is set to cool and that its temperature setting is below the current room temperature. Check your electrical panel for a tripped breaker, but do not repeatedly reset a breaker that trips again. That can signal an electrical issue requiring professional attention.

Look at the return-air filter. If it is heavily coated with dust, replace it with the correct size and type. A clogged filter can reduce airflow and contribute to frozen coils, higher energy use, and uneven cooling. Also make sure the outdoor unit has open space around it. Leaves, grass clippings, and stored items can limit airflow.

Avoid opening electrical panels, handling refrigerant lines, scraping ice from coils, or attempting chemical drain treatments in HVAC components. Air conditioning systems combine electricity, pressurized refrigerant, moving parts, and water. A quick online fix can create a safety hazard or complicate the eventual repair.

Why Prompt Repairs Protect More Than Your Comfort

Putting off an air conditioner repair can affect more than the temperature inside your home. A system that runs continuously may use more electricity while delivering less cooling. Poor airflow and excess indoor humidity can make rooms feel uncomfortable even when the thermostat looks normal. Drain issues can threaten ceilings, walls, floors, and nearby belongings.

There is also the timing problem. A system that is struggling in mild weather may fail completely when outdoor temperatures rise and it has to work harder. Scheduling service when you first notice a consistent change gives you more control than waiting for an emergency on the hottest weekend of the year.

For commercial properties, timely service helps protect employees, customers, equipment, and daily operations. A warm office, retail space, or workplace can quickly become a productivity problem. The same principle applies: diagnose the cause, make the right repair, and prevent a minor performance issue from disrupting the entire building.

Questions Worth Asking Your Technician

You do not need HVAC training to make an informed decision. Ask what caused the failure, whether the repair addresses the root issue, and what signs would indicate a future problem. If a replacement is recommended, ask why repair is not the better value and what efficiency, sizing, or warranty considerations apply to the proposed system.

It is also reasonable to ask how to keep the equipment performing well after the visit. In many homes, routine filter changes, clear outdoor-unit space, and seasonal maintenance prevent avoidable strain. Maintenance cannot stop every breakdown, but it can catch worn parts, drainage concerns, and performance changes before they become urgent.

A comfortable home should not depend on guesswork. When your air conditioner starts sending warning signs, choose a repair team that takes the time to diagnose the problem clearly, explain your options honestly, and treat your time and home with care.

How Does Sewer Camera Inspection Work at Home?

How Does Sewer Camera Inspection Work at Home?

A sewer backup rarely begins with a dramatic flood. More often, it starts with a toilet that bubbles, a tub that drains slowly, or a stubborn clog that returns a few weeks after it was cleared. When the problem is inside a pipe you cannot see, guessing can lead to repeat service calls and unnecessary disruption. So, how does sewer camera inspection work? A trained plumber sends a specialized waterproof camera through the drain line to see the condition of the pipe from the inside.

The goal is simple: identify the real cause and location of the problem before recommending a repair. Instead of treating every recurring clog as a basic blockage, a camera inspection gives your plumber visual proof of what is happening underground or behind walls.

How Does a Sewer Camera Inspection Work?

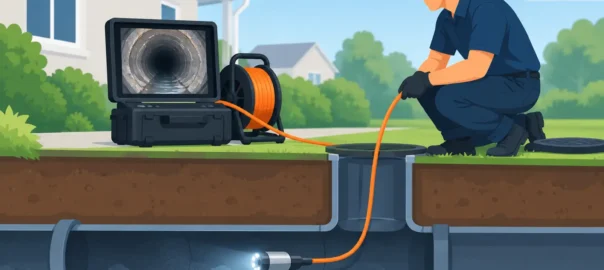
A sewer camera inspection uses a small high-resolution camera attached to a flexible cable. The technician typically inserts the camera through an accessible cleanout, which is a capped pipe that provides entry to the sewer line. In some homes, the camera may be fed through a roof vent or another appropriate drain opening when a cleanout is not available.

As the cable moves through the line, the camera sends live video to a monitor. The technician guides it through bends, fittings, and long runs of pipe while watching for obstructions, damage, and changes in pipe material. Many systems also include a location transmitter, called a sonde, in the camera head. Above ground, the technician can use a receiver to locate the camera and estimate its depth.

That location matters. If the video shows a break or root intrusion, the plumber can mark the affected area rather than excavating an entire yard or opening more flooring than necessary. The inspection may also record footage or capture still images, giving you a clear explanation of the findings.

A camera does not clean the line by itself. If heavy grease, standing water, or packed debris prevents the camera from moving through the pipe, the line may need to be cleared first. In those cases, drain cleaning and camera verification work together: one restores flow, and the other helps confirm why the blockage happened and whether the pipe has a larger issue.

What a Sewer Camera Can Find

A camera inspection is especially useful because several very different problems can create the same symptom. A slow drain may be caused by a simple buildup near a fixture, while repeated backups throughout the home can point to trouble in the main sewer line.

During the inspection, a plumber may find tree roots entering through joints or small cracks. Roots naturally seek water and nutrients, so even a minor opening in an older sewer pipe can attract them. Over time, they can catch toilet paper and waste, narrowing the line until backups occur.

The video can also reveal cracked, crushed, shifted, or collapsed pipe sections. These issues are more common in aging clay, cast-iron, Orangeburg, or poorly supported pipe, but damage can affect newer materials too. Soil movement, construction activity, heavy vehicles, and freezing conditions can all contribute.

Other common findings include grease buildup, wipes and foreign objects, separated joints, pipe bellies, and corrosion. A belly is a low area where a pipe has sagged and holds water or waste instead of carrying it away. A camera can show the standing water, but determining the exact slope issue may require additional evaluation.

Not every mark on the screen means the pipe needs replacement. Light scale inside cast iron, minor buildup, or a small root strand may be manageable with cleaning and maintenance. A dependable recommendation should match the condition shown on the video, the age of the pipe, the frequency of backups, and the likelihood of the problem returning.

When a Camera Inspection Makes Sense

A sewer camera inspection is not necessary for every single slow sink. A clog limited to one bathroom sink is often located in that fixture’s drain and can be resolved without inspecting the entire sewer line. But a camera becomes a smart next step when symptoms suggest a deeper or recurring issue.

Consider requesting one if multiple drains back up at once, sewage appears in a tub or shower when a toilet is flushed, or a drain clog keeps returning after cleaning. It is also valuable if you smell sewer gas, hear gurgling from drains, notice unusually green patches in the yard, or are planning to buy a home with an older sewer line.

For homebuyers, a sewer scope can provide useful information that a standard home inspection may not uncover. The line may look fine from the outside while roots, corrosion, or a partial collapse is developing below ground. It is not a guarantee that no future plumbing issue will occur, but it can help you make a better-informed decision before taking on a major repair.

Commercial properties can benefit as well. A recurring sewer issue can disrupt restrooms, employees, customers, and daily operations. Camera diagnostics help property managers understand whether they need routine maintenance, targeted repair, or a larger sewer-line plan.

What Happens After the Inspection

Once the camera reaches the problem area or the end of the accessible line, the technician reviews what the video shows. You should expect a plain-language explanation of the finding, where it is located, and what options make sense.

If the issue is a buildup or root blockage in an otherwise sound pipe, professional drain cleaning may be the practical repair. If the camera shows a localized crack or separated joint, a targeted repair may be possible. When the pipe has widespread deterioration, repeated root intrusion, or significant bellies and collapse, replacement may provide more reliable long-term protection.

There are trade-offs. Cleaning may cost less upfront but will not repair a damaged pipe. Spot repair can be effective when the rest of the line is in good condition, while full replacement is a larger investment that may prevent repeated disruptions. Your plumber should explain the evidence behind each option instead of pushing a one-size-fits-all answer.

In some cases, the camera cannot pass through a fully collapsed section or an extremely packed blockage. That is still useful information. The technician can locate the stopping point, clear the line if possible, and determine what further work is needed. A camera inspection is a diagnostic tool, not a promise that every pipe can be completely viewed under every condition.

How to Prepare for a Sewer Camera Visit

Most homeowners do not need to do much preparation. If you know where the exterior or basement cleanout is located, clear access to it. Move stored items away from utility areas, keep pets safely out of the work area, and share any history of past backups, drain cleaning, sewer repairs, or large trees near the sewer route.

Avoid running large amounts of water while the inspection is underway unless the technician asks you to. It can also help to mention whether the issue affects one fixture or several. Details such as “the shower backs up when the washing machine drains” can help the plumber choose the right diagnostic path from the start.

A professional inspection should leave you with more than a vague statement that the line is “bad.” You deserve to know what was found, how serious it appears, and what repair approach protects your home and budget. Visual verification is especially valuable after a drain cleaning or repair because it helps confirm the work addressed the actual obstruction or damaged section.

When drains keep giving you the same warning, do not settle for another guess. A sewer camera inspection brings the hidden condition of your plumbing into view, helping you make a calm, informed decision before a small drainage problem becomes a messy home emergency.

When Should Electrical Panel Be Replaced?

When Should Electrical Panel Be Replaced?

A tripped breaker after running the microwave and toaster may be inconvenient. A panel that feels warm, smells burned, or repeatedly loses power is a different kind of problem. Knowing when should electrical panel be replaced helps you protect your home before an aging or overloaded electrical system becomes a safety concern.

Your electrical panel is the control center for the power running through your home. It distributes electricity to lights, outlets, appliances, heating and cooling equipment, and more. When it is working properly, you probably never think about it. When it is not, the warning signs deserve prompt attention from a licensed electrician.

When Should an Electrical Panel Be Replaced?

An electrical panel should be replaced when it can no longer safely handle your home’s electrical demand, shows physical damage or overheating, uses obsolete equipment, or has a defect that makes it unreliable. Replacement is not based on age alone. Some older panels remain serviceable after a professional inspection, while a newer panel may need attention if it was improperly installed or overloaded.

The right decision begins with an on-site evaluation. An electrician can inspect the panel, breakers, wiring connections, grounding, service capacity, and signs of heat damage. That assessment separates a repairable issue, such as a failed breaker, from a panel that has reached the end of its safe working life.

Warning Signs You Should Not Ignore

Electrical problems do not always mean you need a new panel, but they do mean it is time to have one checked. Do not keep resetting breakers or working around a power issue without finding the cause.

Watch for these signs:

  • Breakers trip often. An occasional trip can protect your home from an overloaded circuit. Repeated trips, especially on the same circuit, can point to overloading, faulty wiring, or a breaker that is no longer functioning correctly.
  • Lights flicker or dim. Lights that dim when an appliance starts may signal a heavy electrical load. Frequent flickering throughout the home can indicate a panel, connection, or service issue.
  • The panel is hot, buzzing, or smells burned. Heat, crackling sounds, scorch marks, rust, or a burning odor require immediate professional attention. Turn off power if it is safe to do so and call for electrical service.
  • You have fuses instead of circuit breakers. Fuse boxes are common in older homes and may not provide the capacity or protection modern households need. Replacing a fuse with a larger one is never a safe fix.
  • Outlets feel warm or show discoloration. This can be related to a circuit problem, loose connection, or overloaded wiring. The panel may not be the only issue, but it should be part of the inspection.

A breaker that trips is doing a job. The concern is not the trip itself. The concern is a pattern of tripping that tells you the circuit or panel is under more stress than it should be.

Obsolete Panel Brands Need Special Attention

Some older panel brands have a history of safety concerns and should be evaluated as soon as possible. Federal Pacific Electric panels, often identified as FPE or Stab-Lok, and certain Zinsco or Sylvania-Zinsco panels are examples that electricians commonly flag. Their breakers may fail to trip properly during an overload or short circuit.

If your home has one of these panels, do not wait for a visible problem. A licensed electrician can identify the equipment and recommend a replacement path based on your home’s needs.

Your Home May Have Outgrown Its Electrical Capacity

Homes use far more electricity than they did a few decades ago. Today, a single household may have multiple computers, large televisions, high-powered kitchen appliances, smart-home devices, electric vehicle charging, and upgraded heating or air conditioning equipment. An older 60-amp or 100-amp service may not be enough for the way your family lives now.

A panel upgrade is often needed before or during major improvements. Adding central air, a heat pump, hot tub, electric range, workshop equipment, finished basement, home addition, or EV charger can increase demand beyond what the current panel can support.

This does not mean every project requires a full panel replacement. Sometimes there is adequate capacity, and a new dedicated circuit is all that is needed. Other times, the panel has no room for additional breakers or the service feeding it is too small. An electrical load calculation gives you a clear answer instead of a guess.

Age Matters, But Condition Matters More

Many electrical panels last 25 to 40 years, though that range is only a rough guideline. Moisture, corrosion, poor installation, power surges, loose connections, heavy use, and prior modifications can shorten a panel’s useful life.

An older panel without trouble is not automatically unsafe. Still, it is wise to schedule an inspection if the panel is approaching several decades of use, particularly before buying a home, remodeling, or adding major appliances. A professional can look for corrosion, improper breaker sizing, double-tapped breakers, missing knockouts, poor grounding, and other conditions homeowners cannot reliably diagnose from the outside.

If a panel has been exposed to water from a leak, flood, or storm damage, have it inspected before relying on it again. Water and electricity are a dangerous combination, and corrosion can continue to cause problems after surfaces appear dry.

Panel Repair vs. Replacement: What Is the Difference?

Not every electrical issue calls for a new panel. A single bad breaker, loose connection, damaged outlet, or overloaded circuit may be repaired without replacing the entire box. That is why a proper diagnosis matters. Replacing a panel when a smaller repair will safely solve the issue is unnecessary. On the other hand, replacing only a breaker in a damaged, obsolete, or undersized panel can postpone a larger safety problem.

Replacement is generally the better long-term choice when the panel has widespread corrosion or heat damage, uses unsafe or discontinued equipment, lacks capacity for needed circuits, or has repeated failures. It can also make future repairs and upgrades easier because modern panels provide clearer labeling, more breaker space, and current safety protections.

A panel replacement may include upgrades to grounding, bonding, surge protection, or the service equipment. The exact scope depends on local code requirements and the condition of your existing electrical system. Your electrician should explain what is included, what the work solves, and whether utility coordination or permits are required.

What to Do If You Notice a Serious Electrical Warning Sign

If you smell burning, see smoke, hear arcing or loud buzzing, or notice a hot panel, treat it as urgent. Do not touch the panel if it is wet, damaged, or sparking. Keep people away from the area, call emergency services if there is immediate fire danger, and contact a licensed electrician.

For less urgent concerns, such as recurring breaker trips or limited breaker space, schedule an inspection before installing another appliance or beginning a renovation. Avoid do-it-yourself panel work. Even with the main breaker off, parts of the electrical equipment may remain energized, and improper work can create a serious shock or fire hazard.

Plan the Upgrade Around Your Real Needs

The best replacement panel is not simply the largest one available. It should be sized for your current electrical load, planned upgrades, and likely future needs. A household that expects to add an EV charger or switch to electric heating may benefit from planning capacity now rather than paying for another major upgrade later.

A qualified electrician can walk you through the trade-offs, including panel size, available circuit space, service upgrades, permits, and the condition of the wiring already in your home. Clear answers make it easier to invest with confidence and avoid surprise limits when you are ready for your next home improvement project.

Your home should not ask you to choose between convenience and safety. If your panel is sending warning signs or cannot keep up with how you use power, having it professionally evaluated is a practical next step toward a safer, more dependable home.

How to Reset a Tripped Breaker Safely at Home

How to Reset a Tripped Breaker Safely at Home

A sudden loss of power to one room is frustrating, especially when the refrigerator, home office, bathroom outlet, or furnace stops working without warning. Knowing how to reset a tripped breaker can restore power quickly, but only when the electrical panel shows no signs of a larger safety problem.

A breaker trips because it is designed to protect your home. It shuts off electricity when a circuit is overloaded, a device has a fault, or wiring may be drawing more current than it safely can. Resetting it is usually simple. Repeatedly forcing it back on is not.

First, make sure it is safe to touch the panel

Before opening the electrical panel, look and listen. Do not reset a breaker if you smell burning plastic, see smoke, notice scorch marks, hear buzzing or crackling, or feel heat coming from the panel cover. Step away from the area and call a licensed electrician. Those signs can point to a loose connection, damaged wiring, or a failing breaker that needs professional repair.

Do not stand in water or touch the panel with wet hands. If flooding, a burst pipe, roof leak, or damp wall may have affected the panel or nearby outlets, leave the circuit off. Water and electricity require an immediate professional response.

If the panel appears normal, use a flashlight if needed. Avoid working by candlelight or handling the panel in poor visibility. Keep children and pets away while you check the circuit.

How to reset a tripped breaker step by step

Most modern homes have a breaker panel with rows of labeled switches. The main breaker is usually larger and may be located at the top or bottom of the panel. Individual branch breakers control separate areas and appliances, such as kitchen outlets, bedrooms, HVAC equipment, or a garage.

Follow these steps to reset a tripped breaker safely:

  1. Turn off or unplug devices on the affected circuit. Start with anything that was running when the power went out. Space heaters, hair dryers, toaster ovens, portable AC units, power tools, and multiple kitchen appliances can overload a circuit. Unplugging devices reduces the chance of an immediate trip when power returns.
  1. Find the tripped breaker. A tripped breaker may sit between the ON and OFF positions. On some panels, it can look almost on, so compare it with the neighboring breakers. The panel directory may help identify the right circuit, though labels are not always current in older homes.
  1. Move the breaker firmly all the way to OFF. This is the step many homeowners miss. A breaker generally will not reset if you only push it toward ON from the middle position. Push it fully to OFF first.
  1. Move the breaker back to ON. Use a firm, controlled motion. You should feel it click into place. Do not force a switch that feels stuck, loose, or damaged.
  1. Check whether power has returned. Turn on one light or plug in one simple device, then reconnect other items gradually. If several high-demand appliances were in use, avoid turning them all back on at once.
  1. Watch the circuit for a few minutes. If the breaker stays on and power is stable, the issue may have been a one-time overload. If it trips again, turn it off and stop troubleshooting by resetting it repeatedly.

A breaker that trips once after too many devices were used on the same circuit may not mean there is a wiring defect. For example, running a microwave, coffee maker, toaster, and electric griddle from the same kitchen circuit can exceed its capacity. But a breaker that trips with only one normal appliance connected deserves closer attention.

Why breakers trip in the first place

The most common cause is an overload. Every circuit has a limit, and it can only supply so much power at one time. Older homes are especially likely to have fewer circuits serving more modern devices than the system was designed to handle.

A short circuit is more serious. This happens when a hot wire touches a neutral wire or another conductive path, creating a sudden surge of current. Damaged appliance cords, loose outlet wiring, pests in walls, and aging insulation can all contribute. The breaker trips to stop that dangerous current from continuing.

Ground faults are another possibility, particularly in kitchens, bathrooms, garages, basements, laundry rooms, and outdoor areas. These occur when electricity finds an unintended path to ground. A GFCI outlet may trip before the breaker does. Look for an outlet with TEST and RESET buttons, then press RESET after unplugging any suspect device. If the GFCI will not reset or trips again, leave it alone and arrange service.

Arc faults can also trip certain modern breakers. An arc fault occurs when electricity jumps across a damaged or loose connection. Because arcs can create heat inside walls or outlets, they should not be ignored just because the power comes back after a reset.

When not to reset a tripped breaker again

One careful reset is reasonable when there are no warning signs and an obvious overload likely caused the trip. After that, the breaker is giving you useful information. It may be identifying a failing appliance, an overloaded circuit, a faulty outlet, or an electrical issue hidden behind the walls.

Turn the breaker off and call for electrical service if it trips immediately after you reset it, trips with everything unplugged, trips frequently, or controls an essential system such as your furnace, AC, well pump, sump pump, or refrigerator. You should also call if outlets feel warm, lights flicker, switches spark, or you have recently had water damage, renovation work, or rodent activity.

Never hold a breaker in the ON position, tape it in place, replace it with a larger breaker, or remove the panel cover to inspect wiring yourself. A larger breaker does not solve an overloaded wire. It can allow the wiring to overheat before the breaker shuts the circuit down.

What to do if the main breaker has tripped

If your entire home has lost power but nearby homes still have electricity, the main breaker may have tripped. Check the panel for a large switch labeled MAIN. Before resetting it, turn off individual breakers and unplug major appliances when possible. Then move the main breaker fully to OFF and back to ON.

If the main breaker trips again, leave it off. A whole-home outage can involve a significant overload, damaged equipment, a panel problem, or an issue with the electrical service. This is not a situation for repeated resets.

If your neighbors are also without power, check for a utility outage rather than resetting the panel. A tripped breaker will not restore power if the issue is outside your home.

Reduce the chance of another trip

The practical fix depends on what caused the trip. If it was an overload, spread high-wattage appliances across different circuits and avoid relying on extension cords or power strips for permanent use. Dedicated circuits may be needed for equipment that draws substantial power, including a microwave, dishwasher, disposal, electric heater, garage equipment, or certain HVAC components.

If one appliance repeatedly trips the circuit, stop using it until it has been evaluated. A failing appliance can damage the circuit and create a shock or fire hazard. If the issue involves an older panel, frequent additions to your home, or a remodel, an electrician can assess whether your electrical system has enough capacity for how your household actually uses power.

A tripped breaker is often a quick fix, but it is also a safety device doing its job. When the cause is not clear or the breaker will not stay on, protect your home by leaving the circuit off and bringing in a qualified professional. Empire Care can help identify the real electrical problem and provide a clear path to a safe, lasting repair.

Tankless Water Heater Installation Cost Guide

Tankless Water Heater Installation Cost Guide

A tankless water heater can solve a familiar household problem: someone starts a shower just as the dishwasher is running, and the hot water disappears. But the tankless water heater installation cost is not just the price printed on the unit. Your home’s fuel source, electrical capacity, venting route, hot-water demand, and local permit requirements all shape the final number.

For most homeowners, a properly installed tankless system is a long-term comfort decision. The right unit can provide hot water on demand, use less space than a tank model, and last longer with regular maintenance. The right estimate should also make clear what work your home needs before installation begins.

What Does Tankless Water Heater Installation Cost?

Installed costs commonly range from about $1,000 to $3,000 for a point-of-use electric unit and roughly $2,500 to $5,500 for a whole-home gas tankless water heater. More complex projects can run higher, especially when a home needs a new gas line, upgraded electrical service, extensive venting, or plumbing changes.

These ranges are useful for planning, but they are not a substitute for an in-home assessment. A low upfront price may exclude the work required to make the system safe, code-compliant, and capable of meeting your household’s demand. A qualified technician should look at the complete installation, not simply swap one box for another.

Gas tankless units typically cost more to install than electric models because they may require combustion-air planning, dedicated venting, condensate drainage for high-efficiency models, and gas-piping upgrades. Electric units can be less complicated in some homes, but large whole-home models often need multiple dedicated circuits and substantial electrical capacity.

The Biggest Factors Behind the Final Price

The unit itself is only one part of the project. Installation costs change based on what your home already has and what must be added.

Fuel type and available capacity

If you are replacing a gas tank water heater with a gas tankless model, you may assume the existing gas line is enough. Often, it is not. Tankless units can require a higher gas flow rate because they heat water immediately rather than maintaining a stored supply. A contractor may need to run a larger gas line from the meter or make changes to the existing distribution system.

For electric tankless units, the key question is your electrical panel. Whole-home electric models can draw significant power. If there is not enough available capacity, the project may require a panel upgrade, new breakers, and dedicated wiring. That can be worthwhile, but it should be visible in the estimate before work starts.

Water-heating demand and proper sizing

A tankless heater must be sized for simultaneous use, not just the number of bathrooms in the home. A family that routinely runs two showers, a washing machine, and a dishwasher at once needs more capacity than a couple with one bathroom and modest demand.

Climate matters too. In colder regions, incoming groundwater is colder, so the heater must work harder to create the desired temperature rise. A unit that performs well in a warm climate may not deliver the same flow rate during winter in a northern state.

An oversized unit can raise purchase and installation costs without adding meaningful comfort. An undersized unit can leave you with fluctuating temperatures or reduced flow when more than one fixture is in use. Correct sizing is where an experienced installer protects both your budget and your day-to-day comfort.

Venting and placement

Most gas tankless systems need a safe venting path. Depending on the model, that may involve stainless steel, PVC, or polypropylene vent materials. The length of the run, the number of turns, the location of exterior termination points, and access through walls or ceilings all affect labor and materials.

A straightforward installation on an exterior wall is often less expensive than locating the unit in a tight utility closet with a long route to the outside. The installer also needs to maintain required clearances from windows, doors, walkways, and other building features.

Plumbing changes and water quality protection

Tankless units may need isolation valves, a pressure-relief valve, drain connections, new shutoffs, or relocated water lines. If the old tank heater sits in a different area, moving to a wall-mounted tankless system can add piping work.

Hard water is another important consideration. Mineral scale can build up inside the heat exchanger and reduce performance over time. In areas with hard water, a water treatment solution or routine descaling plan may add to the initial or ongoing cost, but it can help protect the equipment and preserve efficiency.

Permits, code requirements, and labor access

Permits and inspections are not optional extras. They help confirm that gas connections, electrical work, venting, drainage, and safety devices meet local code. Permit fees vary by location, and some jurisdictions have specific requirements for seismic strapping removal, condensate disposal, shutoff placement, or exhaust termination.

Labor also changes when access is difficult. An attic, crawlspace, finished basement, or narrow mechanical room can require more time than an open garage installation. A clear estimate should identify these conditions instead of surprising you after the work begins.

Gas vs. Electric Tankless Water Heater Costs

Gas tankless water heaters are often the better fit for whole-home use because they can deliver higher flow rates. They are especially practical for households with several bathrooms or frequent simultaneous hot-water use. Their higher installation price can be offset by strong performance and, depending on local utility rates, reasonable operating costs.

Electric tankless heaters can work well for a single sink, a remote bathroom, a garage apartment, or a small home with low demand. They do not need combustion venting, which can simplify placement. However, large electric whole-home systems can become expensive if the electrical panel needs major upgrades.

There is no universal winner. The best option depends on your household demand, available utilities, local energy costs, and the condition of your current plumbing and electrical systems.

When Replacing a Tank Heater Costs More Than Expected

Replacing a traditional tank heater with a tankless unit is an upgrade, not always a direct replacement. A tank model may use an existing chimney connection or basic vent arrangement that is not suitable for a high-efficiency tankless system. Likewise, the gas line that served a tank heater may not support the peak demand of an on-demand unit.

This does not mean a tankless upgrade is the wrong choice. It means the estimate needs to account for the full scope. Ask whether the quoted price includes the unit, removal and disposal of the old heater, new valves, venting materials, gas or electrical upgrades, permits, condensate management, startup testing, and inspection coordination.

A price that seems unusually low may reflect a limited scope rather than a better value. The goal is not to pay for unnecessary work. It is to avoid finding out mid-project that essential work was never included.

How to Get a Reliable Installation Estimate

The most useful estimate starts with a technician evaluating your actual home. They should ask about the number of bathrooms, household size, peak hot-water use, fuel source, water quality, and where the current heater is located. They should also inspect the gas piping or electrical panel, venting options, water pressure, and installation access.

Before approving the work, make sure you understand the unit’s expected hot-water output at your local winter water temperature. Ask what maintenance it needs, how often it should be flushed, what warranty coverage applies, and who will handle permit requirements. These details help you compare proposals fairly.

At Empire Care, the focus is on identifying what the home needs before recommending a solution. A clear installation plan gives you a better chance of getting the comfort you expect without avoidable changes, delays, or added costs.

Is a Tankless Water Heater Worth the Investment?

Tankless systems are often worth considering when space is limited, your current tank heater is nearing the end of its life, or your household wants a more consistent supply of hot water. They can also be appealing for homeowners who plan to stay in the home long enough to benefit from a longer equipment lifespan and potential energy savings.

Still, tankless is not automatically the best answer for every home. A high-demand household with limited gas capacity, insufficient electrical service, or difficult venting may face a higher project cost than expected. In some situations, a properly sized high-efficiency tank water heater may be the more practical choice.

The right decision comes down to honest sizing, complete installation pricing, and confidence that the system will perform when your household needs it most. A careful assessment today can keep your next hot shower from becoming tomorrow’s service call.

Water Heater Popping Noise Causes Explained

Water Heater Popping Noise Causes Explained

A pop or rumble from the water heater can make a quiet home feel suddenly uncertain. Most water heater popping noise causes come down to mineral sediment heating inside the tank, but the right response depends on the sound, the age of the unit, and whether other warning signs are present. A little noise may not mean an emergency. Ignoring a noisy heater for months, however, can raise energy bills, reduce hot-water capacity, and shorten the life of the system.

Why a Water Heater Pops

Tank-style water heaters heat water at the bottom of a steel tank. Over time, minerals naturally found in the water supply settle there. This is especially common in areas with hard water, but it can happen in any home.

As the burner or electric heating element heats the tank bottom, water trapped beneath that sediment turns to steam. The steam pushes through and releases in small bursts, creating a popping, crackling, or rumbling sound. Think of it as a thin layer of minerals acting like a lid over pockets of hot water.

The sound is often more noticeable after a long stretch of hot-water use, such as several showers, laundry, and dishwashing in the same morning. It may also happen while the unit is reheating a full tank.

Sediment is the most common explanation, but it is not the only one. A proper diagnosis looks beyond the noise itself.

The Most Common Water Heater Popping Noise Causes

Sediment buildup in the tank

This is the usual culprit. Minerals, sand, rust particles, and other debris settle to the bottom of the tank. The heater must work harder to transfer heat through that layer, so the system may run longer while producing less usable hot water.

A sediment-related pop is generally not an immediate safety event. Still, it is a maintenance issue worth addressing. Left in place, heavy sediment can contribute to overheating, tank damage, inefficient operation, and an earlier replacement than you planned for.

Scale on an electric heating element

Electric water heaters can make a popping or sizzling sound when mineral scale coats a heating element. The element gets hotter than it should as it works through the buildup. In some cases, homeowners also notice slower recovery times or water that does not get as hot as expected.

Unlike a gas heater, an electric model does not have a burner beneath the tank. The source of the sound may be inside the tank around the element rather than at the bottom of a combustion chamber. A technician can test the elements and determine whether cleaning, replacement, or broader tank maintenance makes sense.

A failing dip tube

The dip tube directs incoming cold water to the lower part of the tank, where it can be heated efficiently. If it cracks, breaks apart, or shifts, cold water may mix near the top of the tank too soon. This can lead to inconsistent hot water and occasional unusual sounds as temperatures change rapidly inside the tank.

A dip-tube problem is less common than sediment, but it is worth considering if the popping comes with lukewarm water, reduced hot-water volume, or small plastic pieces caught in faucet aerators.

Expanding and contracting pipes

Not every pop is coming from the heater itself. Hot water causes metal pipes to expand slightly. As they move against framing, straps, or other surfaces, they can make a sharp ticking, popping, or knocking sound.

Pipe-expansion noises often occur right after a hot-water faucet opens or closes. They may be heard in a wall, ceiling, or floor near the water heater rather than directly at the tank. The fix can be as simple as adjusting pipe supports or adding insulation where piping passes through tight spaces, but it takes an inspection to locate the exact contact point.

Pressure or temperature problems

A water heater should not operate with excessive temperature or pressure. The temperature-and-pressure relief valve, often called the T&P valve, is designed to release water if either condition becomes unsafe. If you hear loud banging, see water around this valve or its discharge pipe, smell gas near a gas water heater, or notice steam, treat the situation seriously.

Turn off the water heater if you can do so safely, keep people away from the area, and call a qualified professional. Do not cap, plug, or block a relief valve discharge pipe. That valve is a critical safety component, not a source of inconvenience to silence.

Is a Popping Water Heater Dangerous?

Usually, a mild, occasional pop caused by sediment does not mean the tank is about to fail. It does mean the unit is working under less-than-ideal conditions. The more frequent or louder the noise becomes, the more likely the buildup is significant.

The situation becomes more urgent when popping is paired with leaking water, rusty water, a sulfur or gas smell, a tripped breaker, scorch marks, steam, or a relief valve that is actively discharging. Those symptoms can point to a different problem than ordinary sediment and should not be handled as a routine maintenance project.

Age matters, too. Many traditional tank water heaters last roughly eight to 12 years, though water quality, maintenance, usage, and installation conditions can change that range. Flushing a newer tank with manageable sediment can be worthwhile. On an older heater with heavy buildup, corrosion, or active leaks, the better financial choice may be replacement rather than putting more money into a tank near the end of its service life.

What You Can Check Safely Before Calling

Start by identifying when and where you hear the sound. Does it happen only while the heater is recovering after use? Is it a soft pop, a low rumble, a metallic bang, or a high-pitched whistle? Is the tank leaking, or are the pipes above it making the noise?

You can also look around the unit without removing panels or touching gas, electrical, or hot-water connections. Check for puddles, corrosion around fittings, moisture at the base of the tank, and water coming from the T&P valve discharge pipe. For gas units, leave the area and seek prompt help if you smell gas. Do not attempt to relight a pilot or diagnose a gas odor yourself.

If the area is dry and the only symptom is a mild rumble or popping during heating, schedule maintenance before the problem grows. Do not use a garden hose to drain or flush a heater unless you understand the manufacturer procedure and can safely shut down the unit. Water can be hot enough to cause burns, drain valves can fail on older tanks, and disturbing thick sediment can sometimes expose an already-weakened tank to new problems.

How Professional Service Solves the Problem

A qualified technician starts by confirming whether the sound is sediment, piping movement, a heating-element issue, or a pressure-related concern. That distinction matters. A tank flush will not fix a loose pipe, and replacing an element will not solve a corroded, leaking tank.

For a serviceable tank, maintenance may include flushing accumulated sediment, checking the anode rod, inspecting the T&P valve and discharge piping, verifying temperature settings, and examining gas or electrical components. The technician should also check for signs that the tank is deteriorating from the inside, where problems are not always visible to a homeowner.

If replacement is the more dependable option, you should receive a clear explanation of why. Tank size, household hot-water demand, fuel type, venting requirements, energy use, and available space all affect the right choice. A larger tank is not automatically better, and a high-efficiency or tankless system is not automatically the best fit for every home. The goal is reliable hot water without paying for equipment that does not match your household.

Preventing Future Popping and Rumbling

Regular maintenance is the best defense against sediment-related noise. The ideal schedule depends on water hardness, how much hot water your household uses, and the type of water heater you own. Homes with hard water often need more frequent attention because mineral deposits accumulate faster.

Water temperature also affects wear. Many households do well with a setting around 120 degrees Fahrenheit, which can reduce scalding risk and limit unnecessary strain. Your needs may differ if someone in the home has special health requirements, so ask a professional before making major temperature changes.

If recurring sediment is a problem, ask whether water treatment, a filtration approach, or a maintenance plan would offer real value. The answer depends on your water quality and equipment. The best fix is the one that addresses the source of the buildup, not simply the sound it makes.

A water heater should provide quiet, dependable comfort in the background of daily life. When popping starts, a timely inspection can protect your hot water, your budget, and your confidence in the system that keeps your home running.