Category Archives: Uncategorized

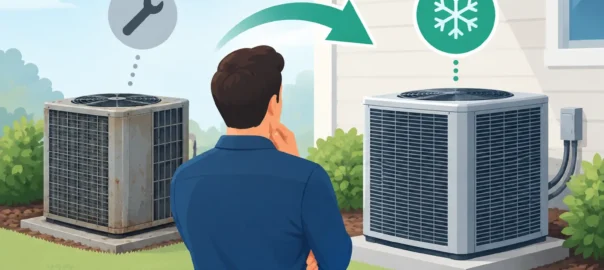
When Should Your HVAC System Be Replaced?

When Should Your HVAC System Be Replaced?

A furnace that quits on the coldest night of the year or an air conditioner that cannot cool the house in July creates an immediate problem. But most replacement decisions arrive more gradually: higher utility bills, repeat repair calls, uneven rooms, and a system that never seems to keep up. Homeowners asking when should an HVAC system be replaced need more than an age limit. They need a clear look at reliability, repair cost, comfort, and what a new system will actually solve.

When Should an HVAC System Be Replaced?

For many homes, a well-maintained air conditioner lasts about 12 to 15 years, while a furnace may last 15 to 20 years. Heat pumps often fall near the air conditioner range because they work year-round. Those are useful planning numbers, not automatic replacement deadlines.

A 14-year-old system that runs quietly, heats and cools evenly, and needs only routine maintenance may have useful life left. On the other hand, a 9-year-old system with a major mechanical failure, poor installation history, or chronic comfort problems may be a poor candidate for another expensive repair.

Replacement becomes the stronger choice when the system is no longer dependable, the repair is substantial, and the equipment is nearing or past its expected service life. It can also make sense when an older unit is technically operational but costs too much to run or leaves part of the home uncomfortable.

The system needs frequent or increasingly costly repairs

One service call does not mean you need a new HVAC system. Motors, capacitors, igniters, contactors, and thermostats can often be repaired affordably. The concern is a pattern: a repair last season, another this season, then a major component failure shortly after.

Pay attention when repair needs move beyond normal wear items. A failed compressor, cracked heat exchanger, leaking evaporator coil, or repeated refrigerant leak can involve a significant investment. If a repair costs close to half the price of replacement and the system is already near the end of its expected life, replacement often provides better long-term value.

The 50 percent guideline is helpful, but it is not a rule that fits every home. A $2,000 repair on a newer, otherwise reliable system may be worthwhile. The same repair on a 16-year-old air conditioner with declining performance may only delay the next disruption. A qualified technician should explain the condition of the entire system, not simply quote the part that failed.

Your energy bills have climbed without a clear reason

Utility rates can change, and extreme weather can push bills upward. Still, a steady rise in heating or cooling costs can signal that HVAC equipment is losing efficiency. Dirty components, duct leaks, inadequate insulation, and thermostat problems can also be responsible, so replacement should not be the first assumption.

A proper evaluation helps separate an equipment problem from a home-performance problem. If the equipment is aging and working harder to deliver less comfort, a modern, properly sized system can reduce waste. The savings vary based on local weather, fuel costs, insulation, thermostat settings, and how efficiently the old system was operating. It is better to view lower operating costs as one part of the decision, not a promise that replacement pays for itself immediately.

Some rooms are too hot, too cold, or too humid

A system that turns on but cannot maintain comfortable temperatures is telling you something. You may notice upstairs bedrooms that stay warm in summer, cold rooms near exterior walls, weak airflow from vents, or a house that feels damp even when the air conditioner is running.

Older equipment may be losing capacity, but the equipment may not be the only issue. Restricted ducts, poor return-air design, insulation gaps, blocked registers, or an oversized unit can all cause uneven comfort. Oversizing is especially common in replacement projects where a new unit is selected based only on the capacity of the old one. A larger system is not automatically better. It may cycle too quickly, remove less humidity, and wear components faster.

Before recommending replacement, the right contractor should inspect airflow, duct condition, system operation, and the home’s heating and cooling load. The goal is not to install the biggest unit. It is to install equipment that fits the home and delivers stable comfort.

The equipment uses R-22 refrigerant

If your older air conditioner or heat pump uses R-22 refrigerant, it does not have to be replaced simply because of the refrigerant. However, R-22 is no longer produced or imported for new use in the United States, which can make refrigerant-related repairs costly and less predictable.

A small repair on an R-22 system may still be reasonable if the equipment is otherwise in good condition. A major leak, compressor failure, or repeated need to add refrigerant changes the calculation. Replacing the system allows you to move to current equipment and refrigerant standards rather than putting major money into technology that is becoming harder to service.

Safety concerns are present

Some HVAC problems are about comfort. Others are about safety. A cracked heat exchanger in a gas furnace, signs of carbon monoxide, electrical damage, repeated breaker trips, or a furnace that produces unusual burning odors requires prompt professional attention.

Do not continue operating equipment that has been identified as unsafe. In some cases, the issue can be repaired. In others, especially with an older furnace and a compromised heat exchanger, replacement is the responsible path. Your family should not have to choose between warmth and peace of mind.

Repair or Replace: Questions That Bring Clarity

The replacement decision becomes easier when you look at the whole picture rather than one number on a repair estimate. Ask how old the equipment is, what has been repaired recently, whether the problem is isolated or recurring, and how well the system keeps your home comfortable.

Also ask what a repair will realistically accomplish. Will it restore dependable operation for several years, or is it simply addressing the latest failure in a system with multiple aging parts? A clear diagnosis should include the immediate repair option, the likely condition of related components, and the risks of waiting.

Comfort matters as much as cost. A system that runs loudly, short-cycles, struggles during peak weather, or leaves humidity high can make daily life frustrating even if it has not completely failed. Replacement is often a planned way to avoid an emergency, giving you time to compare options instead of making a rushed decision after a breakdown.

What to Expect From a Smart Replacement Decision

A new HVAC system is more than an outdoor unit or a furnace in a closet. It is a matched system that includes the right equipment capacity, compatible indoor and outdoor components, proper refrigerant setup, airflow, drainage, electrical connections, and controls.

Start with a thorough in-home assessment. The technician should consider square footage, window exposure, insulation, ductwork, number of occupants, ceiling height, and rooms with known comfort issues. If you are replacing only one component of a split system, ask whether it is compatible with the remaining equipment. Mixing old and new components can sometimes reduce performance or affect warranty coverage.

Efficiency ratings are also worth discussing, but the highest-rated system is not always the best fit. A homeowner who plans to move soon may choose a different option than someone settling into a long-term home. Climate, budget, desired humidity control, fuel type, and available electrical capacity all affect the right choice.

Do not overlook the ductwork. Leaky, undersized, disconnected, or poorly designed ducts can prevent even excellent equipment from performing as expected. A replacement project is a good time to address airflow issues that have made certain rooms uncomfortable for years.

Plan Before the System Forces the Decision

The best time to evaluate aging HVAC equipment is before peak heating or cooling season. You have more time to consider repair costs, compare replacement options, and schedule work around your household instead of reacting to an outage.

Annual maintenance remains valuable even if replacement may be approaching. It can catch safety issues, preserve efficiency, and provide an honest picture of the system’s condition. Keep records of repairs and maintenance visits so you can see whether costs are becoming a trend rather than a one-time event.

If your system is showing its age, ask for a clear, pressure-free assessment. Empire Care can help you understand what is repairable, what is likely to fail next, and whether a replacement would provide the comfort and dependability your home needs. A planned decision today can spare your household from an uncomfortable emergency tomorrow.
Why Is AC Blowing Warm Air? Causes and Fixes

Why Is AC Blowing Warm Air? Causes and Fixes

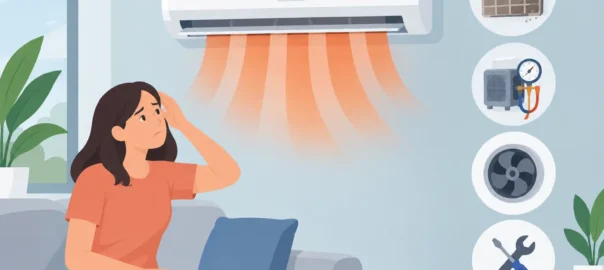
When the thermostat is set to cool but the vents are pushing hot or room-temperature air, comfort can disappear fast. If you are asking, why is AC blowing warm air, the answer may be as simple as a thermostat setting or as urgent as a failed component. The key is knowing what you can safely check and when to call for professional help before a small issue turns into a major repair.

Start With the Simple Checks

Before assuming your air conditioner has failed, check the thermostat. Make sure it is set to Cool, not Heat, Fan, or Auto with an incorrect temperature setting. Set the temperature at least 3 to 5 degrees below the current indoor temperature, then give the system several minutes to respond.

Next, check the fan setting. When the thermostat fan is set to On, the blower runs continuously, even when the outdoor AC system is not actively cooling. That can make it seem like the AC is blowing warm air between cooling cycles. Set the fan to Auto so it runs only when the system is calling for cooling.

Also look at your electrical panel. A tripped breaker may shut off the outdoor condenser while the indoor blower continues running. The result is air coming through the vents with no cooling behind it. If a breaker has tripped, reset it once. If it trips again, leave it off and schedule service. Repeated breaker trips can point to an electrical issue, a failing motor, or an overloaded system.

Why Is AC Blowing Warm Air? Common Causes

Your central air conditioner does not create cold air. It moves heat out of your home through a closed refrigerant system. When any part of that process is interrupted, warm air can be the first warning sign.

A dirty or blocked air filter

A clogged filter restricts airflow. Your system has to work harder to pull air across the indoor evaporator coil, and that coil can become so cold that it freezes. Once ice blocks the coil, airflow and cooling performance drop sharply.

Check the filter monthly during heavy-use seasons. If it looks gray, packed with dust, or visibly blocked, replace it with the correct size and type. A clean filter is one of the most affordable ways to protect efficiency, comfort, and equipment life.

A frozen evaporator coil

Ice on the indoor coil may be caused by poor airflow, low refrigerant, or a mechanical problem. You might notice weak airflow, water around the indoor unit, ice on the refrigerant line, or cooling that gets worse as the day goes on.

Turn the cooling mode off, but leave the fan set to On to help thaw the coil. Do not chip ice away or keep forcing the system to run. Once it has thawed, a technician should identify the reason it froze. Restarting a frozen AC without correcting the cause can damage the compressor.

Low refrigerant from a leak

Refrigerant is not a fuel that your AC regularly uses up. If the level is low, there is usually a leak that needs to be found and repaired. Low refrigerant can prevent the system from absorbing enough heat indoors, leaving you with warm air, longer run times, frozen coils, or unusually high energy bills.

Adding refrigerant without addressing the leak is not a lasting repair. A qualified HVAC technician should test the system, locate the source of the leak, explain the repair options, and recharge it to the manufacturer’s specifications.

A dirty outdoor condenser unit

The outdoor condenser releases the heat collected from inside your home. When its coil is coated in dirt, grass clippings, leaves, or cottonwood, heat cannot escape efficiently. The system may blow warmer air, run constantly, or shut down on a safety limit.

You can safely remove loose debris around the outdoor unit and keep at least 2 feet of open space around it. Do not use a pressure washer or bend the delicate coil fins. If the unit is heavily soiled, professional cleaning is the safer choice.

A failed capacitor, contactor, or compressor

Your outdoor unit relies on electrical components to start and operate. A capacitor helps motors start, while a contactor controls power to the condenser. If either fails, you may hear humming, clicking, or nothing at all outside while the indoor blower still runs.

A compressor problem is more serious because the compressor is the heart of the cooling system. Repair decisions depend on the system’s age, warranty coverage, refrigerant type, and the overall condition of the equipment. A good diagnosis should give you clear options, not pressure you into replacing a system before the cause is confirmed.

A thermostat or control problem

Sometimes the AC itself is capable of cooling, but it is not receiving the correct signal. Dead thermostat batteries, loose wiring, faulty sensors, or a malfunctioning control board can all interrupt the cooling call.

If your thermostat screen is blank, replace the batteries if applicable. If the display works but the system does not respond correctly, avoid removing the thermostat or handling low-voltage wiring unless you are trained to do so. Electrical troubleshooting is best left to a technician who can test the controls safely.

Leaky ducts or insulation problems

If the air at the indoor unit is cold but certain rooms feel warm, the issue may be in the ductwork rather than the AC equipment. Leaky, disconnected, crushed, or poorly insulated ducts can lose cooled air in an attic, crawl space, or wall cavity before it reaches the room.

This problem often shows up as uneven temperatures, weak airflow at select vents, dusty rooms, and higher utility costs. Duct repairs and airflow balancing can make a meaningful difference, particularly in older homes or after renovations.

What You Can Do Right Now

A few basic observations can help speed up a professional diagnosis. Check that the thermostat is on Cool and the fan is on Auto. Replace a dirty filter. Confirm the outdoor unit has power and is free of loose debris. Then listen and look without touching equipment: Is the outdoor unit running? Is there ice on the refrigerant line? Is airflow weak from every vent or only in one area?

Avoid opening electrical panels, removing access covers, or trying to recharge refrigerant yourself. Refrigerant work requires specialized equipment and training, and HVAC electrical components can retain dangerous voltage even after the system is turned off.

If the AC is blowing warm air during extreme heat, close blinds on sunny windows, use ceiling fans, and limit heat-producing appliances while you arrange service. These steps will not fix the system, but they can reduce the strain on your home and help your family stay more comfortable.

When Warm Air Is an Urgent Problem

Schedule HVAC service promptly if the breaker keeps tripping, the system makes grinding or loud buzzing sounds, you smell burning, or you see water pooling around the indoor unit. Turn the system off immediately if you smell electrical burning or see smoke.

Warm air also deserves quick attention when the system runs all day without improving the temperature. Continuing to operate a struggling unit can increase energy costs and put added stress on expensive components. For businesses, a cooling problem can affect employees, customers, equipment, and day-to-day operations, so early diagnosis matters even more.

Repair or Replace: It Depends on the Diagnosis

Not every warm-air call leads to a replacement. A thermostat issue, capacitor, contactor, clogged drain, dirty coil, or refrigerant leak repair may be a practical way to restore dependable cooling. On the other hand, replacement may make more financial sense when an older system has a major compressor failure, uses obsolete refrigerant, needs frequent repairs, or cannot keep up with your home’s cooling needs.

The right choice depends on the full picture: repair cost, system age, efficiency, condition of the ductwork, warranty status, and how reliably the equipment has served your household. Empire Care technicians focus on identifying the real problem first, so you can make a decision with a clear understanding of your options.

A warm vent is your AC asking for attention. Start with the safe checks, turn the system off if you see ice or electrical warning signs, and arrange a professional diagnosis before the next hot day turns a manageable repair into a comfort emergency.

What an Annual Heating System Tune Up Prevents

What an Annual Heating System Tune Up Prevents

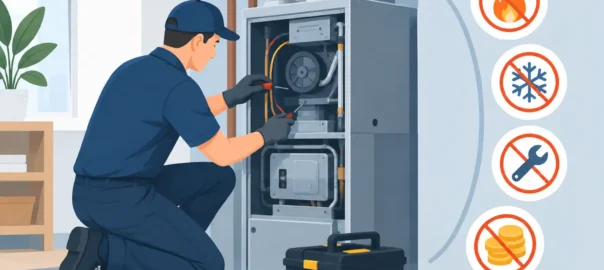
A heating problem rarely announces itself at a convenient time. It shows up on the coldest night of the year, when the house will not warm up, a room stays chilly, or the furnace starts making a sound it never made before. An annual heating system tune up is one of the most practical ways to reduce that risk before your family is relying on the system every day.

This is not about finding work that does not need to be done. It is about giving a trained technician time to spot worn components, airflow restrictions, combustion concerns, and small performance issues while they are still manageable. A well-maintained heating system is more likely to heat evenly, operate efficiently, and make it through the season without an avoidable breakdown.

Why an Annual Heating System Tune Up Matters

Your heating equipment works through a chain of connected parts. The thermostat has to communicate correctly, airflow has to move freely, electrical connections must remain secure, and safety controls need to respond as designed. For gas-fired systems, the combustion process also needs careful attention. One neglected issue can put strain on other components and turn a minor repair into a no-heat emergency.

Regular service can also help your system run closer to the level of efficiency it was designed to deliver. A dirty filter, clogged condensate drain, slipping belt, dirty burner, or struggling blower motor can make the equipment work harder than necessary. That extra effort may show up as longer heating cycles, uneven temperatures, or higher utility bills.

There is no promise that maintenance will prevent every repair. Parts can fail unexpectedly, especially as equipment ages. But a tune-up gives homeowners a clearer picture of system condition and a better chance to plan for repairs or replacement on their own schedule instead of during an urgent outage.

What a Heating Tune-Up Should Include

A professional visit should be more than a quick filter change and a glance at the thermostat. The precise work depends on whether you have a furnace, boiler, heat pump, ductless system, or another type of equipment, but the goal is consistent: confirm safe operation, improve performance, and identify concerns early.

For a typical forced-air furnace, a technician may inspect and test the thermostat, air filter, blower assembly, electrical connections, ignition system, burners, flame sensor, limit switches, and safety controls. They may also check the venting system, gas connections, temperature rise, and visible signs of corrosion or water damage. If the furnace uses a condensate line, that component should be examined as well.

Airflow deserves special attention. A system can produce heat but still leave parts of the home uncomfortable if the filter is restricted, ducts are leaking, return vents are blocked, or the blower is not operating properly. A tune-up does not automatically solve every duct design issue, but it can reveal why the system is struggling to distribute heat.

For heat pumps, maintenance often includes checking the indoor and outdoor units, refrigerant-related performance indicators, defrost operation, electrical components, coils, and drainage. Heat pumps provide both heating and cooling in many homes, so their service needs can differ from those of a conventional furnace.

A thorough technician should explain what was found in plain language. You should understand whether a recommendation is a safety concern, a repair that should be scheduled soon, or an optional improvement that can wait. Clear answers matter when you are deciding how to protect both your comfort and your budget.

Maintenance Is Not the Same as a Repair

A tune-up is preventive service. It focuses on inspection, cleaning where appropriate, testing, and adjustments that help the system operate properly. A repair is needed when a part is damaged, failing, or no longer operating within safe or reliable limits.

That distinction matters because a tune-up can uncover a problem that requires additional work. For example, a technician may find a cracked igniter, a weak capacitor, a dirty flame sensor, or a blower motor drawing too much power. Finding that issue is a benefit of the visit, not a sign that maintenance failed.

When to Schedule Heating Maintenance

Early fall is usually the best time to schedule service for a furnace or other primary heating equipment. The weather is often mild enough that you can comfortably go without heat during the appointment, and technicians may have more availability before the first major cold snap.

If fall has already arrived, it is still worth scheduling. A tune-up is useful whenever the system is heading into a period of regular use. Homeowners who missed preseason maintenance should not assume they need to wait until next year.

Some situations call for service sooner than your regular annual appointment. Contact a qualified HVAC professional if you notice any of the following:

  • The system starts and stops repeatedly or runs much longer than usual.
  • Some rooms stay cold while others become uncomfortably warm.
  • You smell burning, fuel odors, or persistent mustiness near the equipment.
  • The furnace makes banging, screeching, rattling, or grinding noises.
  • Your carbon monoxide alarm sounds, or anyone in the home develops sudden flu-like symptoms while the heat is running.

A carbon monoxide alarm is an essential safety device, but it is not a substitute for professional heating maintenance. If it sounds, get everyone to fresh air, follow emergency guidance, and have the source evaluated before using the equipment again.

Simple Steps Homeowners Can Take Between Visits

Professional maintenance handles the technical and safety-critical work, but homeowners can support better performance throughout the season. Replace or clean the air filter according to the equipment manufacturer’s guidance and your household conditions. Homes with pets, construction dust, or frequent system use may need more frequent filter checks.

Keep supply and return vents open and clear of furniture, rugs, and storage. Closing many vents in an attempt to force heat into certain rooms can create airflow problems and may put unnecessary strain on the system. Instead, mention persistent cold rooms during your service visit so the cause can be evaluated.

Make sure the area around the furnace, boiler, or air handler remains accessible and free of stored items. Combustible materials should never be kept near fuel-burning equipment. For outdoor heat pump units, remove leaves, branches, and snow buildup carefully while maintaining clearance around the unit.

It also helps to pay attention to changes. A new noise, a rising utility bill, frequent thermostat adjustments, or a system that takes longer to heat the home can provide useful clues. Calling early is usually less stressful than waiting for the equipment to stop completely.

When a Tune-Up Leads to a Replacement Conversation

An older heating system does not always need to be replaced. If it is heating safely, repairs are reasonable, and operating costs are acceptable, continued maintenance may be the right choice. Age alone is not a diagnosis.

Still, replacement becomes worth discussing when repairs are frequent, a major component fails, comfort is consistently poor, or the system is nearing the end of its expected service life. A technician should help you compare the immediate repair cost with likely future needs, energy use, warranty considerations, and the size and condition of your home.

The lowest upfront price is not always the best value, and the most expensive system is not automatically the right fit. Proper sizing, installation quality, duct condition, and thermostat setup all affect real-world comfort. Empire Care approaches these decisions with the goal of giving homeowners clear options, not pressure.

A heating system should not be something you worry about every time the forecast drops. Schedule service before the busy season when you can, ask direct questions about what your technician finds, and give your home the attention it needs to stay safe and comfortable when the cold sets in.

What to Do When Your Furnace Smells Burning

What to Do When Your Furnace Smells Burning

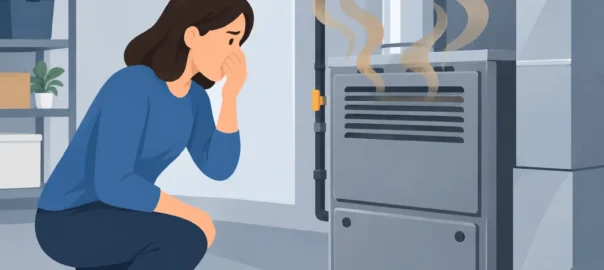
A burning smell from the furnace can turn a routine heating cycle into a real concern fast. If you are wondering what to do when furnace smells burning, start by paying attention to the type of odor, how long it lasts, and whether you notice smoke, unusual sounds, or changes in how your home feels. Some smells are temporary. Others are a clear signal to shut the system down and call for help.

Your furnace is responsible for keeping your home safe and comfortable during cold weather. When something does not smell right, it is better to act cautiously than to hope the problem goes away on its own.

First, Decide Whether You Need to Shut the Furnace Off

A brief dusty or slightly burning odor can be normal when you turn on the heat for the first time in months. Dust settles on internal components and in the ductwork during the off-season. When the furnace heats up, that dust burns away. The smell should usually fade after one or two heating cycles.

If the odor is strong, gets worse, returns every time the furnace runs, or comes with visible smoke, shut the furnace off at the thermostat. If you can do so safely, turn off power to the furnace at its service switch or circuit breaker as well. Do not keep restarting the system to see whether the smell clears.

Leave the home and call 911 or your gas utility immediately if you smell rotten eggs or sulfur. Natural gas is odorized to make leaks easier to detect. Do not operate light switches, appliances, lighters, or phones inside the home if you suspect a gas leak.

What a Burning Furnace Smell May Mean

The smell itself often provides useful clues. It cannot replace a professional diagnosis, but it can help you explain the situation clearly when you request service.

Dust or a Mild Musty Burning Smell

This is the most common first-use odor. It is usually caused by dust on the heat exchanger, burners, or other warm furnace surfaces. Open a window briefly if needed, replace a dirty air filter, and monitor the system. If the odor disappears quickly and does not return, the furnace may be operating normally.

A dusty smell that lingers for more than a day deserves a closer look. Heavy dirt buildup, a clogged filter, or debris in the ductwork can make your system work harder and reduce indoor air quality.

Burning Plastic, Rubber, or Electrical Odors

A sharp smell like melting plastic, hot rubber, or burning wires is not a smell to ignore. It can point to an overheating blower motor, damaged electrical wiring, a failed capacitor, a slipping belt on an older system, or an object that has come into contact with a hot component.

Turn the furnace off and arrange for a qualified HVAC technician to inspect it. Electrical problems can worsen quickly, and continued operation can damage the furnace or create a fire risk.

Burning Oil or Smoke

Visible smoke, an oily burning odor, or a strong smoky smell calls for immediate action. Shut the system down. If there is active smoke or fire, leave the house and call 911. If there is no active fire but the odor remains, do not run the furnace again until a technician has inspected it.

In some cases, smoke may come from a clogged filter that has restricted airflow and caused components to overheat. It may also be caused by motor failure, wiring damage, or a problem inside the burner assembly. The cause matters, which is why a proper inspection is safer than a guess.

A Chemical or Formaldehyde-Like Smell

A new furnace may produce a temporary chemical odor as manufacturing oils and protective coatings heat up for the first few cycles. This should fade relatively quickly. If a chemical odor is strong, causes headaches or throat irritation, or continues after several uses, turn off the system and have it evaluated.

Older furnaces can also develop odors when electrical insulation, internal materials, or wiring begins to overheat. The age of the equipment and the exact smell both affect the next step.

What to Do When Furnace Smells Burning: Safe Steps at Home

Once you have ruled out an immediate gas-leak or fire emergency, take a few safe, practical steps. Do not remove furnace panels, handle wiring, or attempt to repair burners or motors yourself.

Start by checking the thermostat. Turn the heat setting off and wait for the furnace to stop running. Then look around the furnace area without touching hot equipment. Remove boxes, paper, paint cans, laundry supplies, and other stored items that are too close to the unit. Furnaces need clear space for safe operation and service access.

Next, inspect the air filter. A filter that looks gray, packed with dust, or bowed inward may be restricting airflow. Replace it with the correct size and type for your system. Do not run the furnace without a filter, and do not stack filters to try to catch more dust. Both choices can create airflow problems.

Check your supply and return vents throughout the home. Furniture, rugs, and closed vents can restrict airflow, which can contribute to overheating. Open the vents that have been closed and move obstructions away from returns. This will not fix a failed component, but it can eliminate a common source of strain.

Finally, make note of what happened. Record when the smell began, whether it occurs at startup or throughout the heating cycle, whether smoke is visible, and whether you hear rattling, squealing, buzzing, or banging. Those details help a technician diagnose the issue more efficiently.

When a Burning Smell Is an Urgent Repair Call

Call for professional furnace service promptly when the smell is not clearly related to first-use dust. The same applies if the odor keeps returning after you replace the filter and clear the area around the equipment.

You should also request service if your furnace is short-cycling, blowing cool air, tripping a breaker, making new noises, or setting off a carbon monoxide detector. Carbon monoxide has no smell, so never use your sense of smell as proof that combustion equipment is safe. If a carbon monoxide alarm sounds, get everyone outside, call 911 or emergency services, and do not reenter until authorities say it is safe.

A trained technician can inspect the blower assembly, electrical connections, burners, heat exchanger, venting, safety switches, and airflow. This is where professional diagnosis protects both your comfort and your repair budget. Replacing a filter is simple. Diagnosing why a motor is overheating or why a safety limit is tripping requires the right tools and experience.

Prevent the Next Furnace Odor Before It Starts

Many furnace smells are avoidable with routine maintenance. Change filters on schedule based on the filter type, household conditions, pets, and system use. A home with shedding pets or ongoing renovation dust may need more frequent filter changes than a home with lighter use.

Schedule annual heating maintenance before the coldest part of the season whenever possible. A professional tune-up can identify loose electrical connections, worn motors, dirty burners, airflow restrictions, and venting concerns before they become an inconvenient breakdown.

Keep the furnace area clean and clear year-round. Avoid using the space as a storage closet, especially for flammable products. Make sure smoke alarms and carbon monoxide alarms are working, with fresh batteries where required. These small habits give your household an extra layer of protection when heating season arrives.

A Burning Smell Is Worth Taking Seriously

A furnace that smells dusty on its first run may only need a clean filter and time to burn off settled debris. A furnace that smells like wiring, rubber, plastic, oil, or smoke needs a more cautious response. Shut it down when the odor is strong or persistent, protect your household first, and let a qualified heating professional identify the real cause before you rely on the system again.

Your home should feel warm without making you question whether it is safe. When a furnace smell does not seem normal, trust that instinct and get it checked.

9 Clear Signs Your Home Needs Repiping Soon

9 Clear Signs Your Home Needs Repiping Soon

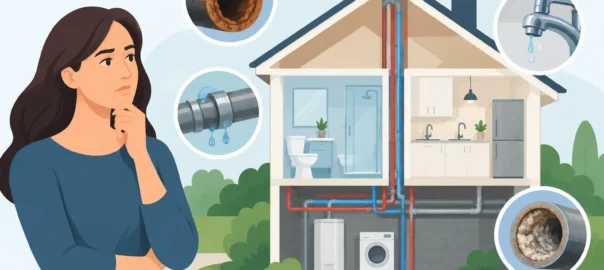
A pipe can fail quietly for years before it creates the kind of leak that damages ceilings, floors, or furniture. That is why knowing the signs your home needs repiping can help you make a measured decision before a plumbing problem becomes an emergency. A whole-home repipe is a significant project, but repeated repairs to aging pipes can cost more, disrupt your routine, and leave the underlying problem untouched.

Signs Your Home Needs Repiping

One isolated leak does not automatically mean every pipe in your home is failing. A loose fitting, worn supply line, or single damaged section may be repaired effectively. The concern begins when problems repeat in different rooms, water quality changes, or the plumbing system shows its age in several ways at once.

1. You have recurring leaks

A repaired leak should stay repaired. If you have had leaks behind walls, under sinks, near the water heater, or beneath the slab more than once, the issue may be the condition of the piping itself. As older pipes corrode, thin, or develop pinhole openings, fixing one spot does not prevent the next weak point from failing.

Watch for water stains, peeling paint, warped flooring, a musty smell, or an unexplained increase in your water bill. Even a small hidden leak can feed mold growth and cause expensive structural damage over time. A professional assessment can determine whether the leak is isolated or part of a larger pattern.

2. Your water comes out rusty, brown, or yellow

Discolored water is one of the clearest warnings that metal pipes may be corroding on the inside. Rust particles can break loose and travel to faucets, especially after water has been sitting in the pipes overnight or while you have been away.

Brown or yellow water can also come from a water heater, municipal work, or a temporary disturbance in the water supply. If the discoloration clears after running cold water for a short time and does not return, the source may be limited. But if it returns often, appears at multiple fixtures, or affects cold water as well as hot water, your pipes deserve a closer look.

3. Water pressure has dropped throughout the house

Low water pressure makes ordinary tasks frustrating. Showers feel weak, washing machines take longer to fill, and two fixtures running at the same time can leave everyone with a trickle. Mineral buildup and internal corrosion can narrow older pipes until water simply cannot move through them as it should.

Pressure problems are not always caused by failing pipes. A faulty pressure regulator, a partially closed shutoff valve, or a leak can produce similar symptoms. The key is proper diagnosis. Replacing pipes when the problem is a single valve is unnecessary, but ignoring widespread corrosion can keep you paying for temporary fixes.

4. Your plumbing is made of outdated or high-risk materials

The age of your home offers an important clue. Homes built decades ago may have galvanized steel pipes, which commonly corrode internally as they age. Some older properties may also contain polybutylene piping, a material associated with cracking and failure in certain conditions.

Not every older home needs immediate repiping, and the exact material matters. Copper and modern PEX plumbing can last for many years when properly installed. Still, if your home has older galvanized or polybutylene lines and you are already seeing leaks, low pressure, or discolored water, it is wise to discuss replacement before a larger failure occurs.

5. Repairs keep adding up

A plumbing repair is worthwhile when it solves the actual problem for a reasonable cost. It becomes less practical when you are calling for another pipe repair every few months. Beyond the repair invoices, consider the cost of missed work, water damage restoration, and the stress of wondering where the next leak will appear.

Ask for clear information about the condition of the surrounding pipe, not just the broken section. If corrosion is widespread, a planned repipe can be a better financial decision than continuing to patch a system near the end of its service life.

6. Your water has an unusual taste or odor

A metallic taste may point to corrosion within aging metal pipes. An earthy, musty, or sulfur-like odor can have several possible causes, including bacteria in drains, issues with the water heater, or water supply concerns. It should not be dismissed, especially when it appears with staining or discoloration.

A qualified plumbing professional can help separate a pipe issue from a fixture, drain, or water-heater problem. If there is any concern that water quality could affect your household’s health, use appropriate testing and follow local water guidance rather than guessing at the source.

7. You hear frequent banging, rattling, or whistling

Pipes can make noise for harmless reasons, such as water hammer when a valve closes quickly. But persistent banging, vibrating, or whistling may signal loose pipe supports, excessive water pressure, restricted lines, or aging components.

Noise alone is not a reason to repipe a home. Combined with leaks or low pressure, though, it can help complete the picture. A technician should inspect the plumbing system and water pressure before recommending major work.

8. You can see corrosion around exposed pipes

Take a look at exposed piping near the water heater, under sinks, in the basement, garage, crawl space, or utility room. Flaking, greenish buildup around copper fittings, rust, damp spots, or crusty connections can indicate deterioration.

Visible corrosion does not always reveal how the pipe looks inside the wall. It does, however, provide a useful reason to schedule an inspection. Catching deterioration before a line bursts gives you more control over timing, budget, and repair options.

9. Your home has had water damage from pipe failures before

Previous pipe leaks are more than a repair history. They are evidence that your home has already experienced the disruption and expense of plumbing failure. If a previous leak occurred in an older plumbing system, it is reasonable to ask whether nearby lines are likely to fail next.

A careful evaluation can identify areas where replacement is most urgent. In some homes, a partial repipe is the right answer. In others, replacing the full supply system at once avoids repeated wall repairs and helps protect finished spaces from future damage.

When a Repair Makes Sense and When Repiping Does

Repiping is not the automatic answer to every plumbing problem. A newer system with one damaged line, a failed fixture connection, or a localized freeze break may only need a targeted repair. This approach is often faster and less expensive when the rest of the piping is in good condition.

A whole-home repipe is more appropriate when the system has widespread corrosion, repeated leaks in separate locations, outdated pipe material, or ongoing pressure and water-quality concerns. The goal is not to sell more work than your home needs. It is to solve the cause of the problem instead of repeatedly responding to its symptoms.

A thorough evaluation should include a discussion of your home’s pipe material, age, repair history, water pressure, visible corrosion, and the locations of past leaks. Depending on the concern, the technician may also inspect the water heater, shutoff valves, fixtures, and accessible supply lines. This information supports a recommendation you can understand and compare.

What to Expect During a Whole-Home Repipe

A professional repipe begins with a clear plan. Your plumbing team should explain which lines are being replaced, the recommended material, where access will be needed, how long work is expected to take, and what wall or ceiling repairs may be required afterward.

Modern replacement materials are selected based on the home’s layout, local code requirements, water conditions, and budget. Copper remains a proven option, while PEX is commonly used for its flexibility and corrosion resistance. There is no single best material for every property. The right choice depends on your system and the installation plan.

During the project, technicians typically protect work areas, shut off water as needed, install new supply lines, test connections, and restore service. Some access holes in drywall may be necessary. That inconvenience is real, but a planned project is usually far less disruptive than emergency water damage after a burst pipe.

Plan Before a Small Leak Becomes a Major Repair

If you suspect aging pipes, start documenting what you see. Note the date and location of leaks, take photos of discoloration or corrosion, and keep plumbing invoices. This record helps reveal patterns that are easy to miss when each issue happens months apart.

Do not wait for a pipe to burst to ask questions. A clear diagnosis gives you time to review options, schedule work around your household, and make a confident decision. Empire Care can assess the condition of your plumbing, explain whether repair or repiping is the sensible path, and help you protect the comfort and safety of your home.

How to Replace a Leaking Faucet Without Surprises

How to Replace a Leaking Faucet Without Surprises

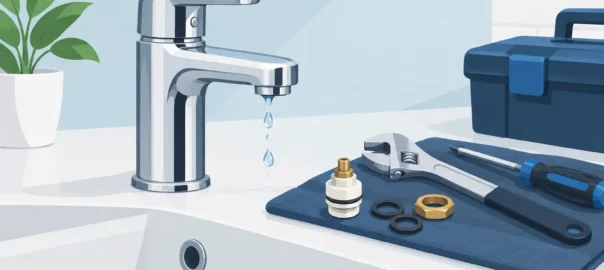
A faucet that drips into the sink may seem minor, but the problem can become expensive quickly. Water can damage the cabinet below, stain countertops, and raise your water bill one drip at a time. Knowing how to replace a leaking faucet gives you a clear path forward when a repair is no longer the sensible choice.

Replacing a faucet is manageable for many homeowners, especially when the existing supply lines and shutoff valves are in good shape. The key is not rushing the job. Confirm what is actually leaking, buy a faucet that fits your sink, and stop the water before loosening a single connection.

First, decide whether replacement is the right fix

Not every leaking faucet needs to be replaced. A drip from the spout often comes from a worn cartridge, washer, O-ring, or valve seat. Replacing that small part may cost less and preserve a faucet that is otherwise in good condition.

Replacement makes more sense when the faucet is corroded, visibly cracked, loose at its base, difficult to operate, or leaking from several places. It is also a practical choice when replacement parts are hard to find or the finish has deteriorated beyond what you want in your kitchen or bathroom.

Look carefully at where the water appears. Water around the handle can point to an internal cartridge or seal problem. Water collecting under the sink may come from the supply lines, drain assembly, shutoff valve, or faucet connections instead. If you cannot identify the source with confidence, a plumbing professional can diagnose the issue before you spend money on the wrong solution.

What to check before buying a new faucet

The new faucet must fit both your sink and your daily routine. Most sinks have one, two, three, or four mounting holes. A single-handle faucet may use one hole, while a widespread bathroom faucet usually needs three. An escutcheon plate can cover unused holes in some installations, but it will not solve every mismatch.

Measure the distance between the outer mounting holes if you have a three-hole sink. Centerset faucets generally use a 4-inch spread, while widespread faucets commonly use an 8-inch spread. For kitchen sinks, check the spout reach and height, especially if there is a window, shelf, or cabinet above the sink.

Also inspect what is under the sink. Older shutoff valves may be stiff, corroded, or prone to leaking when operated after years of sitting in one position. Supply lines that look brittle, rusty, or kinked should be replaced during the project. A new faucet connected to failing old hardware is not a lasting repair.

Gather the right tools and materials

Have everything ready before shutting off the water. A typical faucet replacement calls for a basin wrench, adjustable wrench, channel-lock pliers, bucket, towels, flashlight, and penetrating oil for stubborn mounting nuts. You may also need plumber’s putty or silicone sealant, depending on the faucet manufacturer’s instructions.

Use new braided supply lines if the faucet does not include them. Choose lines with the correct connection size and enough length to reach the shutoff valves without stretching, twisting, or making a sharp bend. Keep the installation instructions nearby. Details such as gasket placement and tightening order vary by model.

How to replace a leaking faucet step by step

Shut off the water and relieve pressure

Start by turning the hot and cold shutoff valves clockwise beneath the sink. Open the faucet to confirm the water is off and to release pressure from the lines. If either valve will not close fully or begins dripping around its stem, stop there. Turning off water at the main valve may be necessary, and a failed shutoff valve is a good reason to call for plumbing service.

Place a bucket and several towels under the sink. Even after the water is off, supply lines and the faucet body will hold a small amount of water.

Disconnect the old faucet

Use an adjustable wrench to loosen the nuts connecting the supply lines to the shutoff valves. Hold the valve steady with a second wrench if needed. Avoid forcing a corroded valve or twisting the pipe behind it, which can create a much larger leak.

Next, look up behind the sink basin for the mounting nuts that secure the faucet. This is often the most awkward part of the job. A basin wrench reaches the nuts in the tight space where ordinary wrenches cannot. Apply penetrating oil and give it time to work if the nuts are corroded.

Once the mounting hardware and supply lines are disconnected, lift the old faucet out from above. Scrape away old putty, mineral buildup, and residue from the sink surface. The new faucet needs a clean, dry surface for its gasket or sealant to work properly.

Install the new faucet

Set the new faucet into the correct mounting holes, following the manufacturer’s directions for any gasket, putty, or sealant. Keep the faucet centered and straight before tightening it underneath. A helper can hold the fixture in place while you secure the mounting nuts.

Tighten the hardware until the faucet is stable, but do not overtighten. Excess force can crack a sink, damage threads, or distort the gasket. Connect the hot and cold supply lines to the corresponding shutoff valves. Hand-tighten first, then use a wrench for a small additional turn. The goal is a secure connection, not maximum force.

If you are installing a kitchen faucet with a pull-down sprayer, attach the hose, weight, and quick-connect fitting exactly as instructed. Make sure the hose can move freely without catching on pipes, stored items, or the cabinet wall.

Turn the water back on slowly

Close the faucet handle, then open each shutoff valve slowly. Watch every connection under the sink as water pressure returns. Check around the faucet base, supply-line connections, shutoff valves, and any sprayer hose connections.

Run both hot and cold water for a minute. This flushes debris from the lines and lets you test the faucet under normal flow. Remove and rinse the aerator if the water sputters or flow seems weak after installation. Finally, fill the sink and drain it while inspecting the cabinet below for leaks.

Common mistakes that create new leaks

The most common problem is overtightening. Faucet connections and mounting hardware need to be snug, but too much pressure can damage fittings and create the very leak you were trying to eliminate. Another frequent mistake is reusing old supply lines, particularly when they show corrosion or have been bent repeatedly.

Do not use plumber’s putty on surfaces where the manufacturer calls for silicone or a rubber gasket. Some natural-stone countertops can also be stained by traditional putty. And never ignore a slow drip after testing. A small leak beneath a sink can soak cabinet materials unnoticed for weeks.

When it is better to call a plumber

A faucet replacement becomes more complicated when the shutoff valves fail, the sink mounting surface is damaged, the water lines are corroded, or access beneath the sink is extremely limited. The same is true if you find mold, swollen cabinet flooring, or water damage after removing the old fixture.

Professional help can also save time when the leak may not be the faucet at all. A trained technician can identify whether water is coming from the drain, garbage disposal, supply connection, valve, or hidden pipe and resolve the actual problem. Empire Care technicians focus on clear diagnosis and repairs that protect your home, not temporary guesswork.

A new faucet should make daily routines easier, not leave you checking under the sink with a flashlight. Take your time, test every connection, and act quickly if anything continues to drip. Protecting a small area today can prevent a much bigger repair tomorrow.

Hidden Water Leak Detection at Home: 9 Signs

Hidden Water Leak Detection at Home: 9 Signs

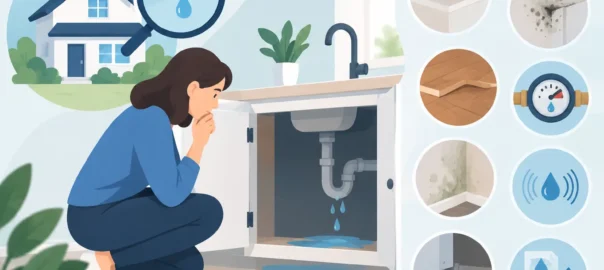
A water leak does not need to flood the kitchen to cause expensive damage. A faint musty smell behind a bathroom wall, a water bill that suddenly climbs, or a warm patch on the floor can all point to water escaping where it should not. Hidden water leak detection at home is about noticing those early warnings before moisture damages framing, flooring, insulation, or indoor air quality.

Some leaks are simple fixes, such as a toilet flapper that never fully seals. Others are buried behind walls, under slabs, or beneath landscaping. The goal is not to tear into your home looking for a problem. It is to gather a few clear clues, stop active damage when necessary, and bring in a qualified plumber when the evidence points to a concealed leak.

9 signs you may have a hidden water leak

1. Your water bill rises without a clear reason

A higher bill is not always a leak. Seasonal lawn watering, houseguests, filling a pool, or a new appliance can raise usage. But if your household routine has not changed and the bill keeps increasing, water may be running continuously somewhere out of sight.

Compare the current bill with the same month last year when possible. This helps account for normal seasonal changes and makes a true usage spike easier to spot.

2. Your water meter moves when everything is off

The water meter is one of the most useful tools for hidden water leak detection at home. Turn off faucets, ice makers, washing machines, dishwashers, irrigation, and any other water-using equipment. Then check the meter. Many meters have a small leak indicator that spins or pulses with even a small amount of flow.

If the indicator continues moving after all water use has stopped, there may be a leak on the plumbing system. Check again after 30 to 60 minutes without using water. A changing reading adds stronger evidence, but it does not identify the location or cause.

3. You hear water when no fixture is running

A steady hiss, faint rushing sound, or occasional tapping inside a wall deserves attention, especially in a quiet house. Water pressure can make a small pipe leak surprisingly audible. You may hear it near a bathroom, laundry room, water heater, or basement ceiling.

Do not confuse pipe noise with normal sounds from an ice maker, water softener, sump pump, or HVAC system. If the sound persists and you cannot connect it to a working appliance, a professional inspection is the safer next step.

4. Walls, ceilings, or floors change color or texture

Discoloration is one of the clearest visual warnings. Look for yellow or brown ceiling rings, bubbling paint, peeling wallpaper, warped baseboards, or drywall that feels soft when gently pressed. On flooring, watch for cupping hardwood, loose vinyl, cracked tile, or carpet that feels damp along an edge.

Water does not always appear directly below the leak. It can travel along pipes, framing, and ceilings before becoming visible. That is why a stain is a signal to investigate, not proof of where the pipe has failed.

5. A musty odor keeps returning

A damp, earthy smell in a bathroom, closet, laundry room, or lower level often means moisture has been present long enough to affect surrounding materials. Cleaning the room may temporarily cover the odor, but it will not solve a leak behind the wall or below the floor.

Mold can develop where persistent moisture is left untreated. If you see visible growth, experience a strong odor, or find damaged materials, address the water source first. Cosmetic repairs should come after the leak has been located and corrected.

6. Your toilet seems to run on its own

A toilet can quietly waste a significant amount of water without leaving a puddle on the floor. If it refills at random, makes a soft running sound between flushes, or causes the meter to move, the flapper, fill valve, or flush valve may be leaking internally.

A simple dye test can help. Add a few drops of food coloring to the tank and wait about 15 minutes without flushing. If color appears in the bowl, water is passing through the toilet. This is often a straightforward repair, but it should not be ignored.

7. There is a warm spot on the floor

A warm area on a slab floor can indicate a hot-water line leak below the concrete. You may also notice that the water heater runs more often or that hot water seems to run out sooner than usual. In some homes, a cold-water slab leak can create cool or damp areas instead.

This is not a project for guesswork. Cutting flooring or concrete before the leak is properly located can add unnecessary cost and disruption. Leak detection equipment helps narrow down the source so repairs can be planned with less damage to your home.

8. Water pressure has changed

A sudden pressure drop throughout the house can have several causes, including a failing pressure regulator, a municipal supply issue, mineral buildup, or a plumbing leak. If lower pressure appears alongside high water use, sounds of running water, or damp spots, take the combination seriously.

Pressure that fluctuates can also strain fixtures and appliances. A plumber can test pressure, inspect accessible components, and determine whether the issue is related to the supply line, a fixture, or a hidden leak.

9. Your yard has one unusually wet or green area

A soggy patch, mud during dry weather, or a strip of grass that grows faster than the rest of the lawn can indicate a damaged underground water line. Water may also pool near the foundation or emerge near a driveway, sidewalk, or exterior wall.

First rule out irrigation. A leaking sprinkler line can create similar symptoms, and the repair approach differs from a main water service line problem. If the area remains wet when irrigation is off, schedule an inspection promptly.

What to do when you suspect a leak

Start by protecting the home, not by opening walls. If water is actively flowing, turn off the fixture valve if you can identify it. For a major leak, use the main shutoff valve. Every homeowner should know where this valve is located and make sure it can be operated before an emergency occurs.

Next, document what you see. Take photos of stains, wet flooring, meter readings, and any damage that changes over time. Note when you first noticed the problem, whether it worsens after using hot water or certain fixtures, and whether the water is clean, rusty, or sewage-contaminated. These details can speed up diagnosis.

Avoid relying on temporary patches for a concealed leak. Tape, sealant, and a dehumidifier may limit surface symptoms, but they do not repair a compromised pipe or fitting. Likewise, do not run a water heater, dishwasher, or washing machine if a leak may be affecting nearby electrical connections.

When to call a plumber right away

Call for professional help immediately if water is coming through a ceiling, pooling near electrical outlets, soaking flooring, or affecting a water heater. The same applies when you suspect a slab leak, a broken underground line, sewage backup, or mold caused by ongoing moisture.

For less urgent signs, a licensed plumber can use pressure testing, moisture readings, camera inspection where appropriate, and specialized leak-location methods to identify the source without unnecessary demolition. The right repair depends on the pipe material, accessibility, age of the system, and extent of damage. Sometimes a targeted repair is the sensible choice; in an older system with repeated failures, replacement of a larger section may provide better long-term value.

Empire Care approaches plumbing problems with clear diagnosis and practical next steps, so you are not left guessing whether a stain, sound, or bill is becoming a larger repair.

A hidden leak rarely gets cheaper by waiting. If your meter is moving, your home smells damp, or a surface is changing for no clear reason, protect your property by getting the source checked before a small warning becomes a major restoration project.